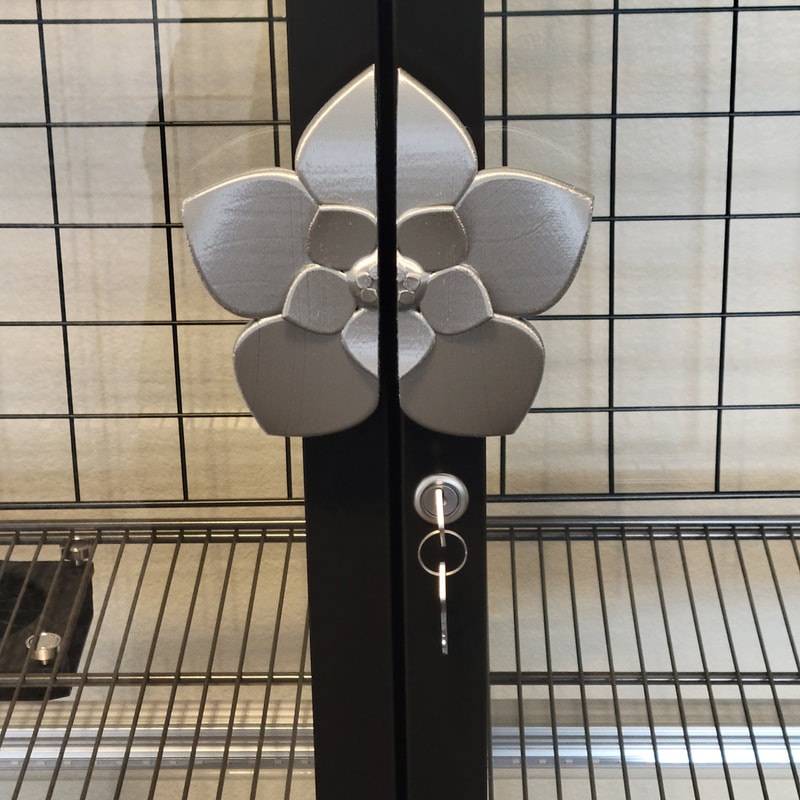
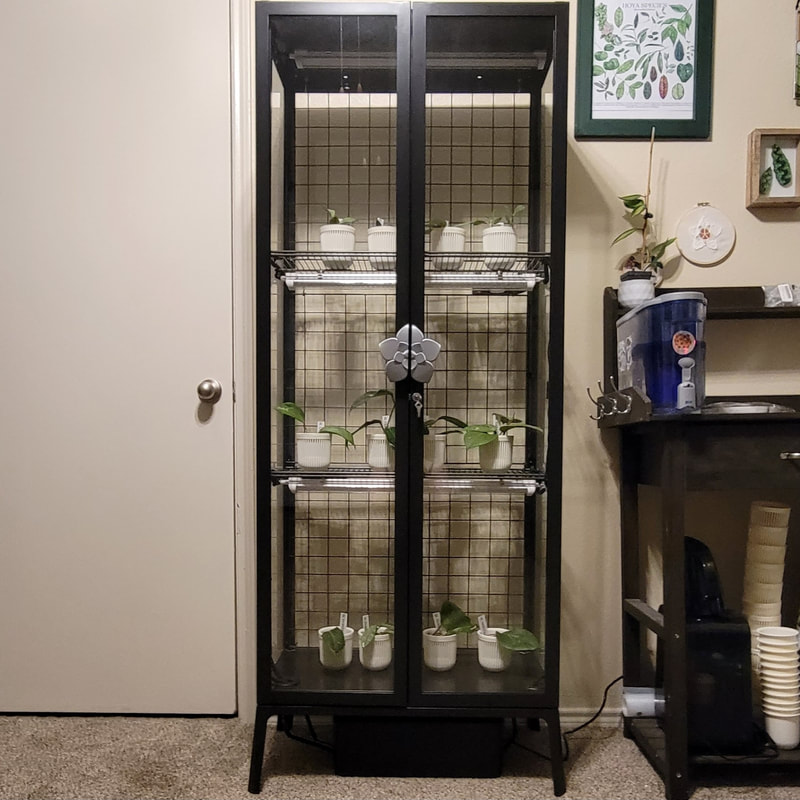
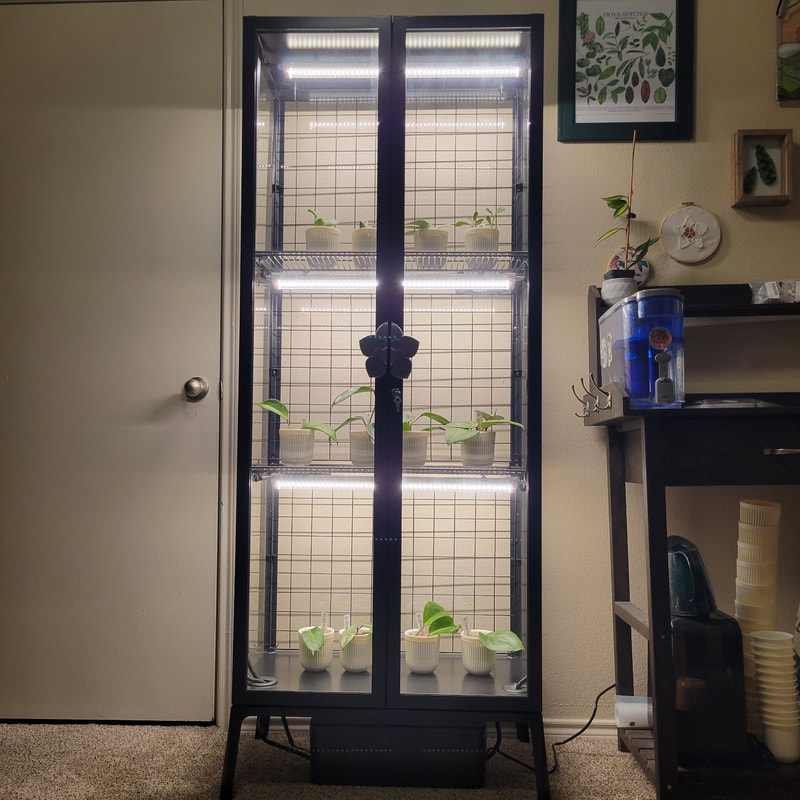
I recently sold my Hoya collection as well as my greenhouse tent set up. I am restarting my plant collection from scratch with a few cuttings. I decided it was time for an upgrade. This time around I don't plan on having as many plants so I am opting for an IKEA milsbo greenhouse. I love the sleek look of the cabinet. I was looking on the Ikea Greenhouse Club Facebook group for inspiration and ran across a post by Stasick Burdeynyy and absolutely loved how aesthetically pleasing it is. CLICK HERE FOR AMAZON BUILD LIST. CABINET BUILD MASTER LIST: Milsbo cabinet Hole Saw Grommets WD40 Corrosion Inhibitor Cable Management Box Cable Hider Cord Protector Electrical Tape Smart Power Strip Wireless Hygrometer Wall Grid (x2) Cable Ties Fan (x2) USB Cover Caps Screws M4x8mm (top fan) Screws M4X20mm (bottom fan) M4 nuts (bottom fan) Magnetic Hooks (x2) Barrina T8 Grow Lights Extended Connector Light Cables (optional) Screws M4X6mm (for lights) Bracket Hangers Elfa Wire Shelf 12x3 (x2) L Shaped Brackets Screws M4X10mm (for brackets) Silicone & Foam Weatherstripping Hoya Flower Door Handles I did run into a small snag with the brackets for the grow lights. The tutorial linked to Stasick's post is using the old brackets that the lights used to come with before Barrina changed them. I was able to get the old bracket hangers on Amazon. Click here to watch the magnet light assembly. The supplies used list is slightly different from the one on that post. Thread the screw on the underside of the bracket and up into the magnetic base. You do not need the use the hook part of the magnetic hooks. Depending on how many shelves/lights you want in your cabinet you might need to buy longer wire connectors to daisy chain the lights together. I did three lights in my cabinet and was fine with the standard issued cords. If you choose to do two lights, I would recommend getting the extended connectors. LIGHT SUPPLIES: Screws M4x6mm Magnetic Hooks Bracket Hangers Barrina T8 Grow Lights Extended Connector Light Cables (optional)
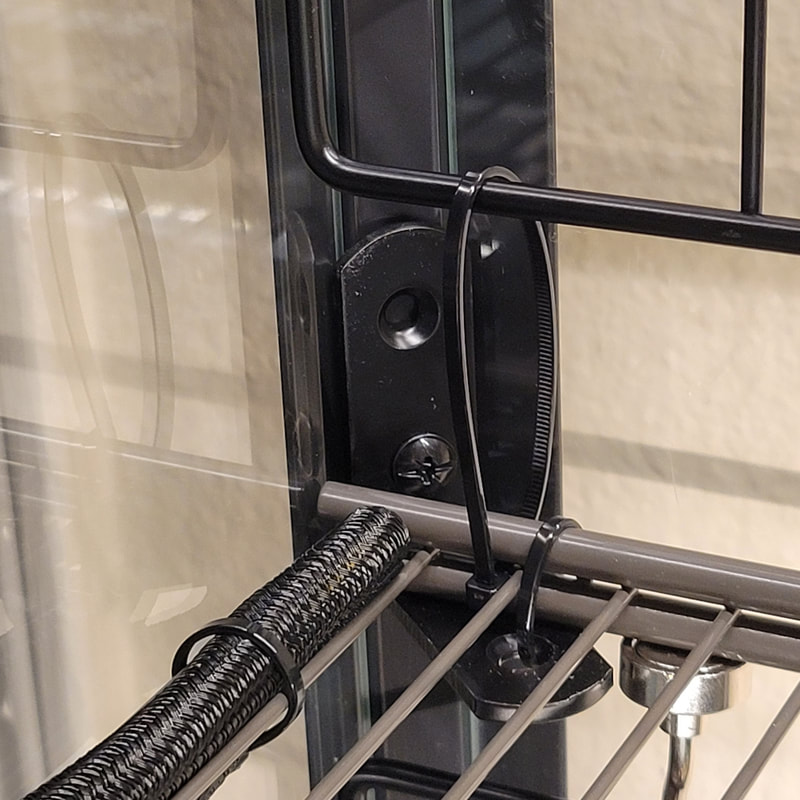
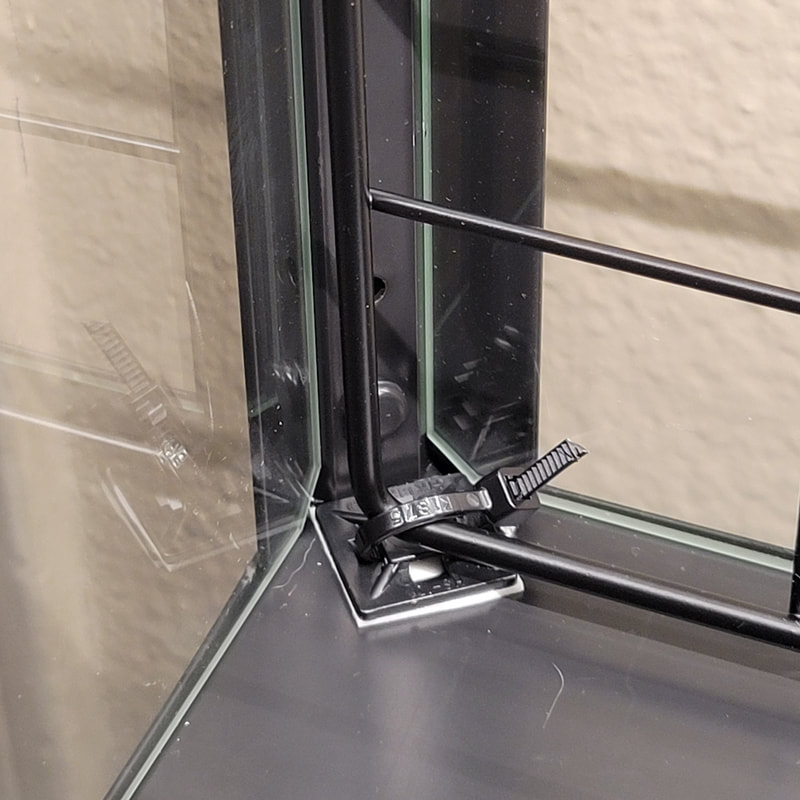
For the wire shelves you do have to have them cut down to the width of the Milsbo cabinet which is 26 inches. If you purchase the wire shelves listed below from the container store when you check out it'll give you the option to have the shelves cut. Make sure to purchase the 12" x 3'. The brackets are installed using the pre-existing holes of the Milsbo cabinet. I used four brackets per shelf and only screwed in the bottom hole of the vertical side. I opted to use all of the rubber stoppers which is why I needed additional screws for the brackets. By using the rubber stoppers your cord management won't be as clean but the glass panels will be better secured. To secure the shelves I did zip tie the inner corners of the brackets to the shelf corners.
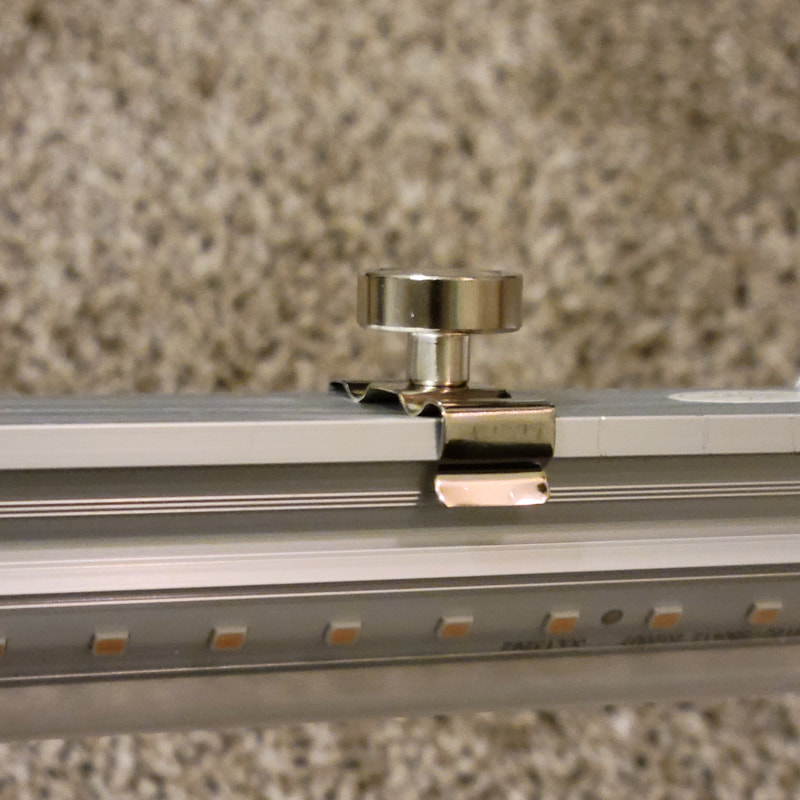
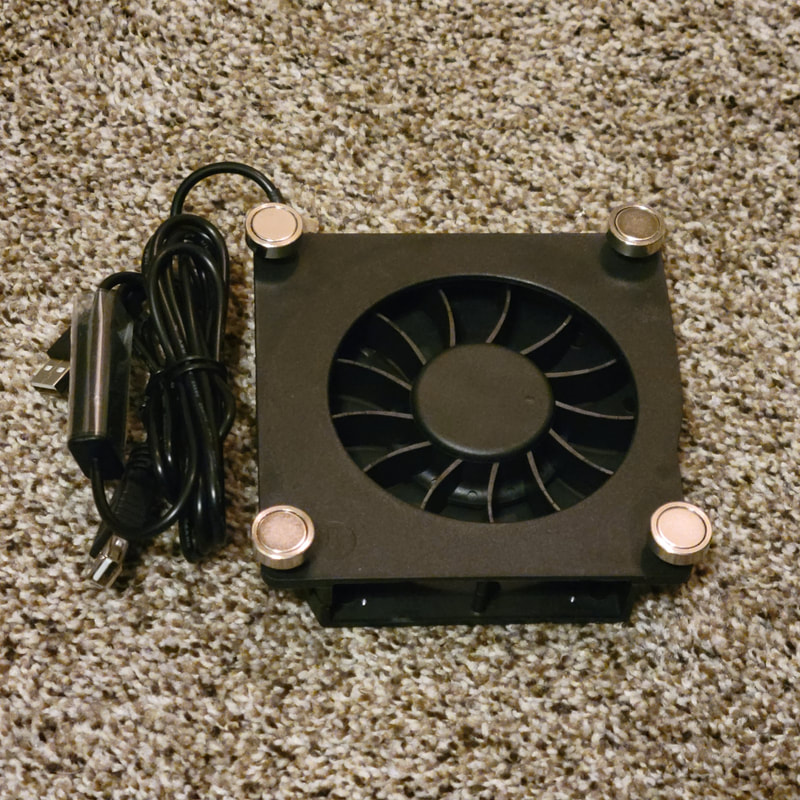
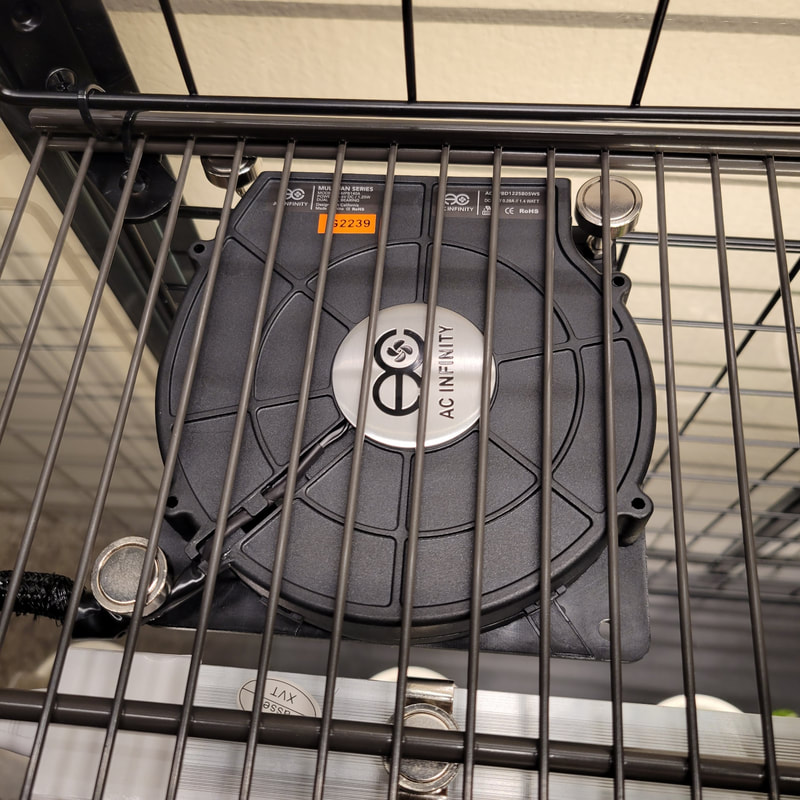
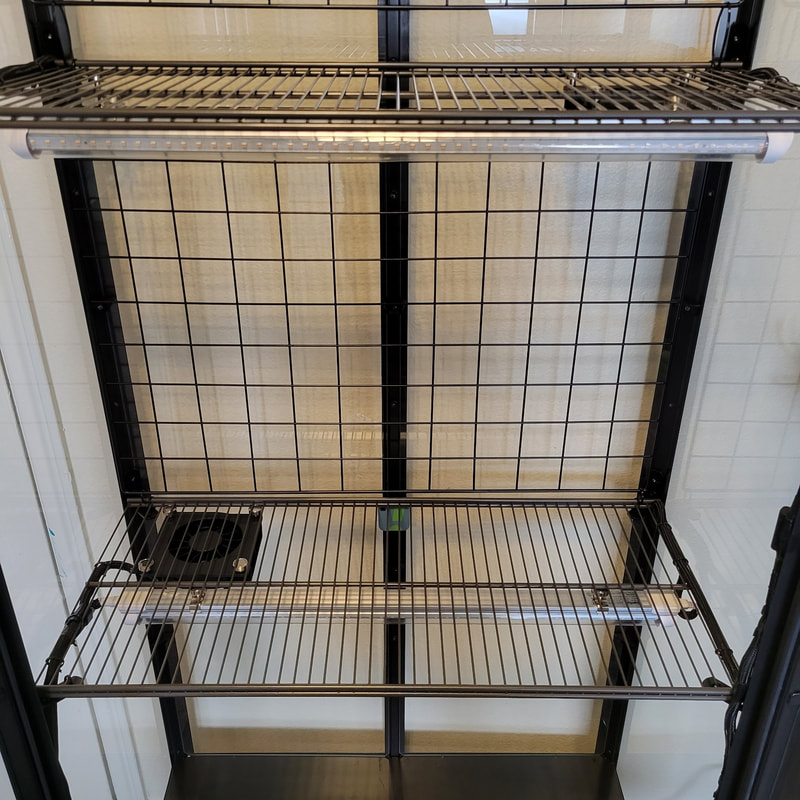
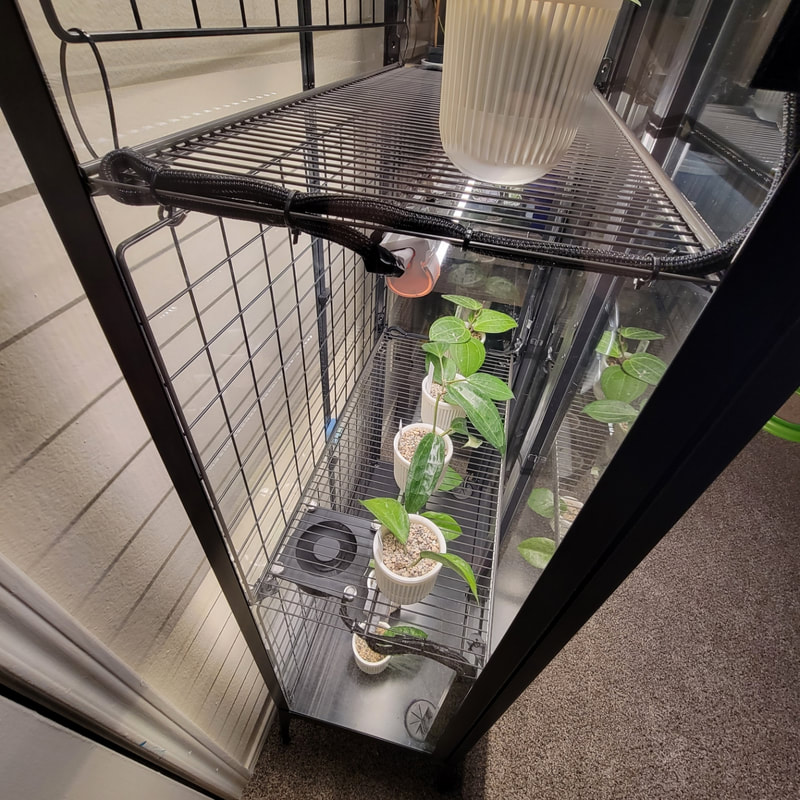
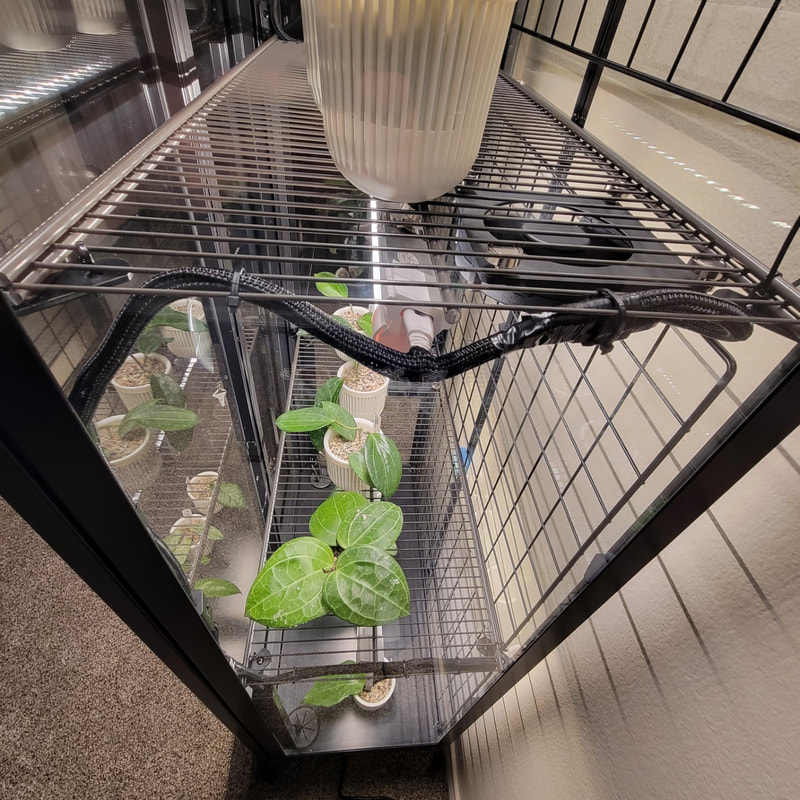
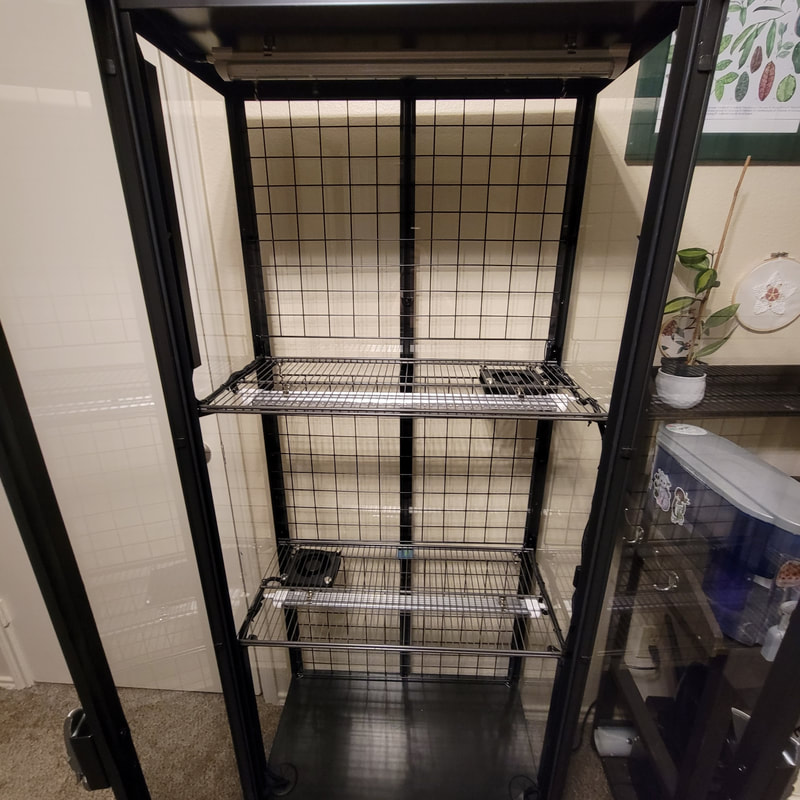
To install magnets into the fans you will first need to take out the rubber stoppers in all four corners. Thread the screws through the fan and into the magnetic base. You do not need the use the hook part of the magnetic hooks. The fan on the top shelf I assembled it as depicted in the second image using M4X8mm screws. For the bottom shelf fan, I faced the fan downward and only used two magnetic bases as depicted in the third and fourth images. Due to the thickness of the fan utilizing the fan this way requires M4X20mm screws which I used a nut to secure before twisting the magnetic base on. I chose to face the fans in opposite directions to help air flow instead of both fans blowing air only upwards. Also, there are two USB plugs on each fan. I used a cover cap on the shorter USB wire to prevent moisture from getting into it. FAN INSTALL SUPPLIES: Fan x2 USB Cover Caps Screws M4x8mm (top fan) Screws M4X20mm (bottom fan) M4 Nuts (bottom fan) Magnetic Hooks
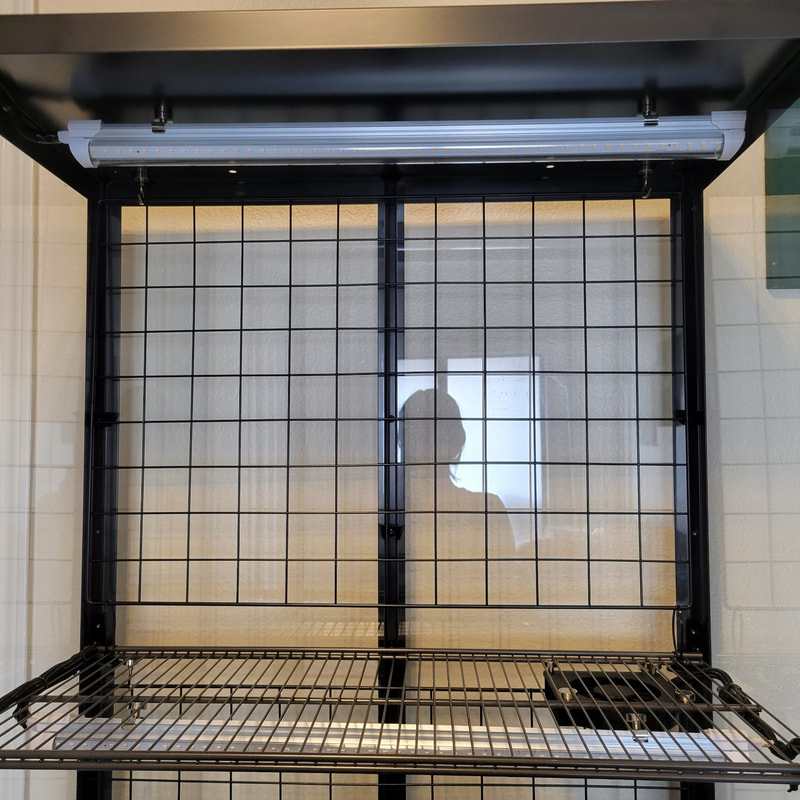
For the first wall grid I used magnetic hooks to hang it from the roof of the cabinet. I then secured the bottom with zip ties in both corners that tied down to the first shelf. The second grid I attached the magnetic hooks to the bottom of the top shelf and again secured with zip ties to the corners of the second shelf. The third wall grid I attached magnetic hooks to the bottom of the lower shelf and secured with 3M adhesive zip ties Those specific adhesive zip tie mounts came with either the cable management box supplies or the fans.
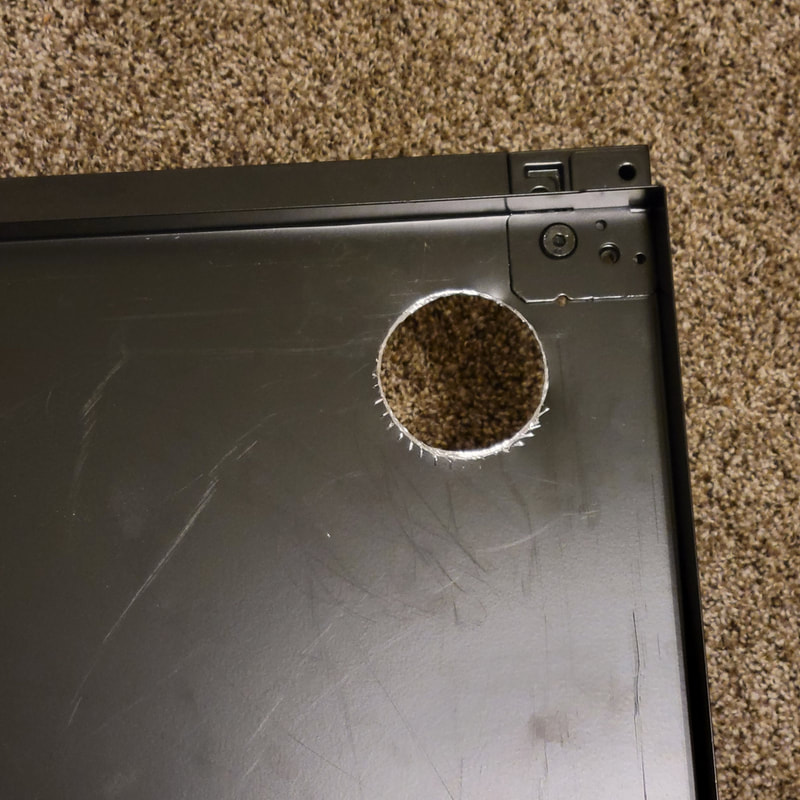
For the hole saw bit you do need to have access to a drill. I know that sounds intuitive but I didn't realize all I had was a gyroscopic screwdriver and the hole saw bit did not fit. If you don't have a drill, you can get a cheap RYOBI 18V drill from Amazon for around $30. That is the same drill I ended up using. Also, when you do drill the holes, you have to be mindful where the legs are and not put the holes too close. There are two separate panels that need to be drilled through. I ended up drilling one hole on each side of both panels. I did read that some people use a cone drill bit instead of the hole saw. It definitely is hard work getting through the metal and takes a little patience. The key is to make sure the drill is spinning the right way (not in reverse) and use light pressure. Some people spray WD40 before drilling to make it easier. I did not try that so I can't speak to that. For my cabinet I decided to put the holes in the front instead of the back so I can hide the cords better. I know some people are now just drilling a hole in the top and storing everything on top of the cabinet to reduce any water dripping into the electrical components. After all the holes were drilled, I checked that the grommets would fit in. My base holes were not super clean so I did go in with a Dremel and smooth around the edges until I could push the grommets in. Drilling through the panel that sits on top of the base seemed to be easier and didn't require any post drill sanding down with the Dremel. Next, I removed the grommets temporarily so I could spray the holes with WD40 corrosion inhibitor to prevent rust on the raw edges. I heard that STA-BIL rust stopper works well too. The spray doesn't dry down so I cleaned up the excess residue and put the grommets in for good.
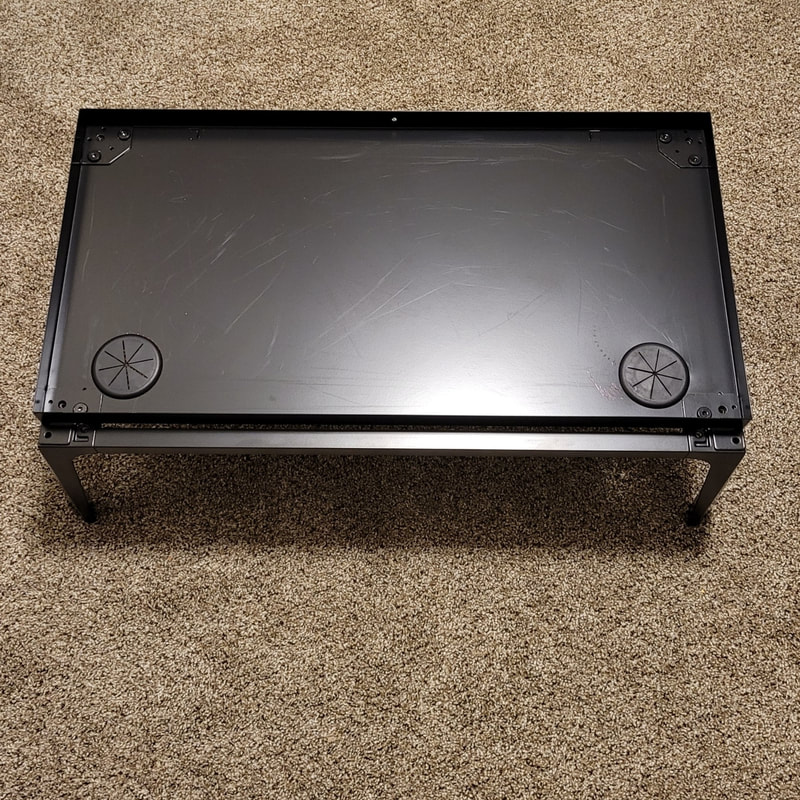
Depiction: holes drilled on base before shelf bottom was installed
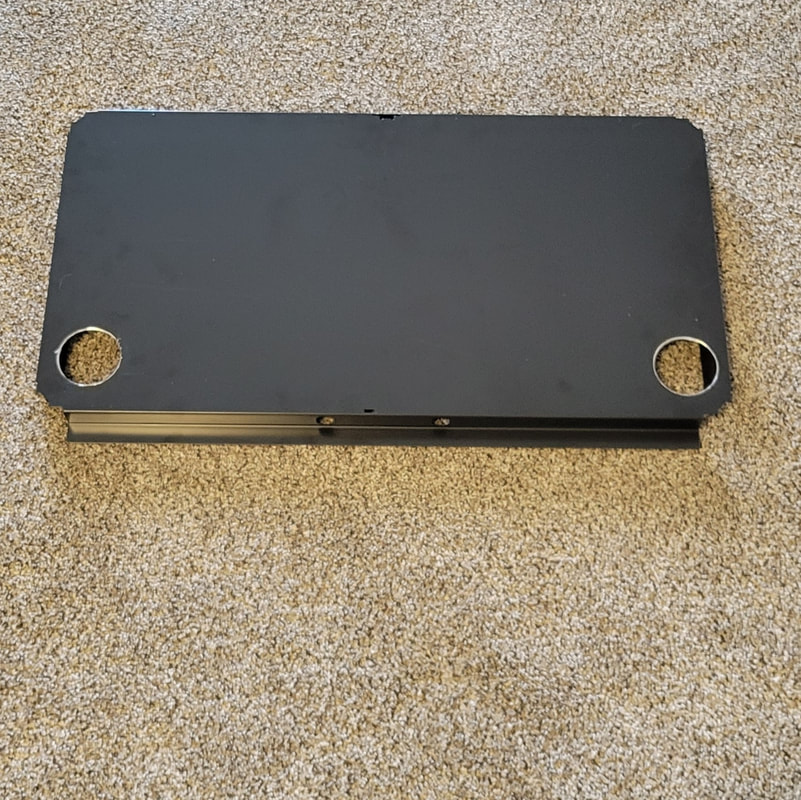
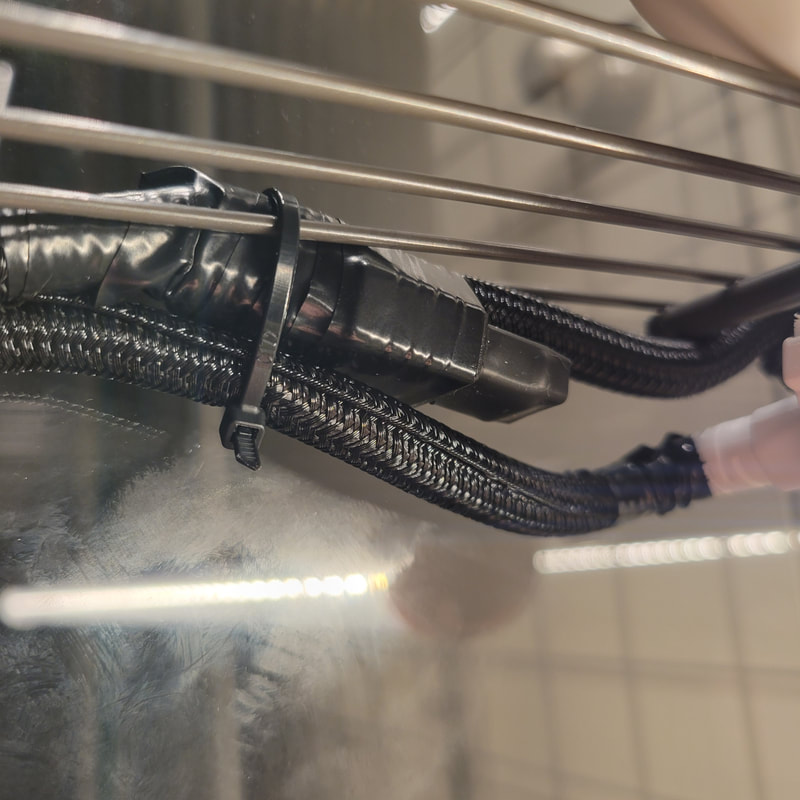
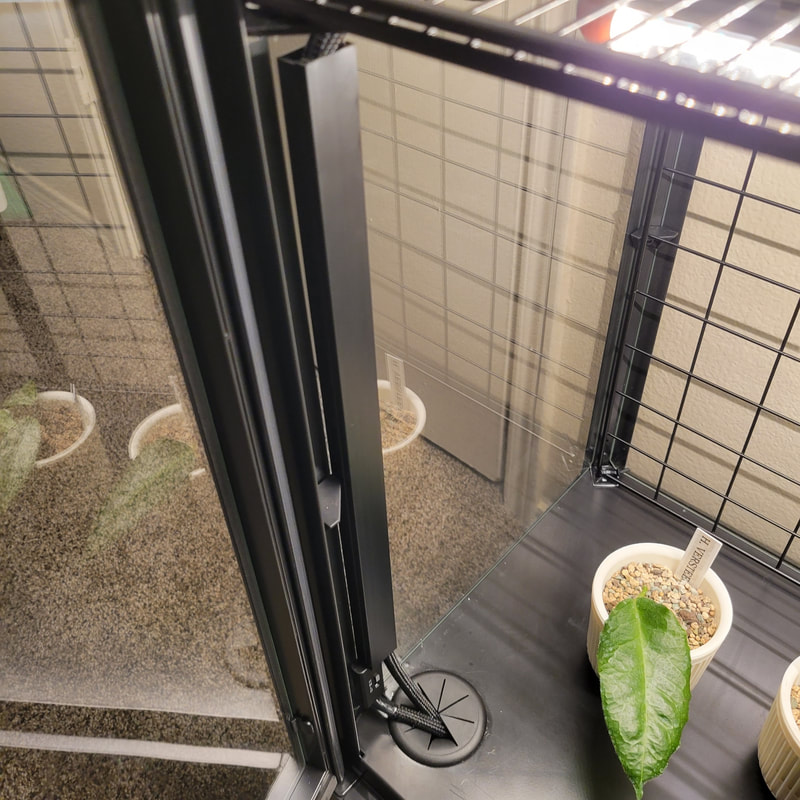
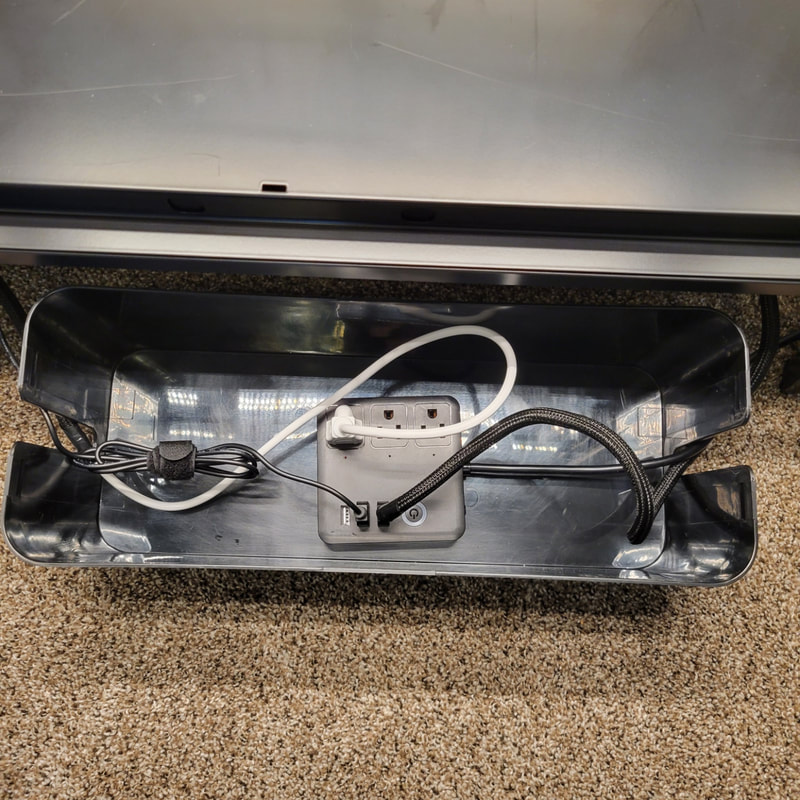
Depiction: holes drilled on bottom panel of cabinet before installation One of the hardest parts of putting together the cabinet is getting the cord management to look really neat and clean. One issues I ran into was with the rubber stoppers. The stoppers hold the glass panels in the cabinet and also are used to support the glass shelves. I noticed in Stasick's video he only put the stoppers in the top and bottom corners of the cabinet. I opted to use them all just to keep the integrity of the glass. By doing this it made the path for the cords to travel down uneven. Using a cable hider on the sides of the glass helped give it a cleaner look. I wrapped all the cords with cord protector. I also used electrical tape to secure the extra USB fan wire to the cord protector so it would protrude less. I put USB cover caps over the smaller USB fan wire on each fan. CORD MANAGEMENT SUPPLIES: Cable Management Box Cable Hider Cord Protector Electrical Tape Smart Power Strip
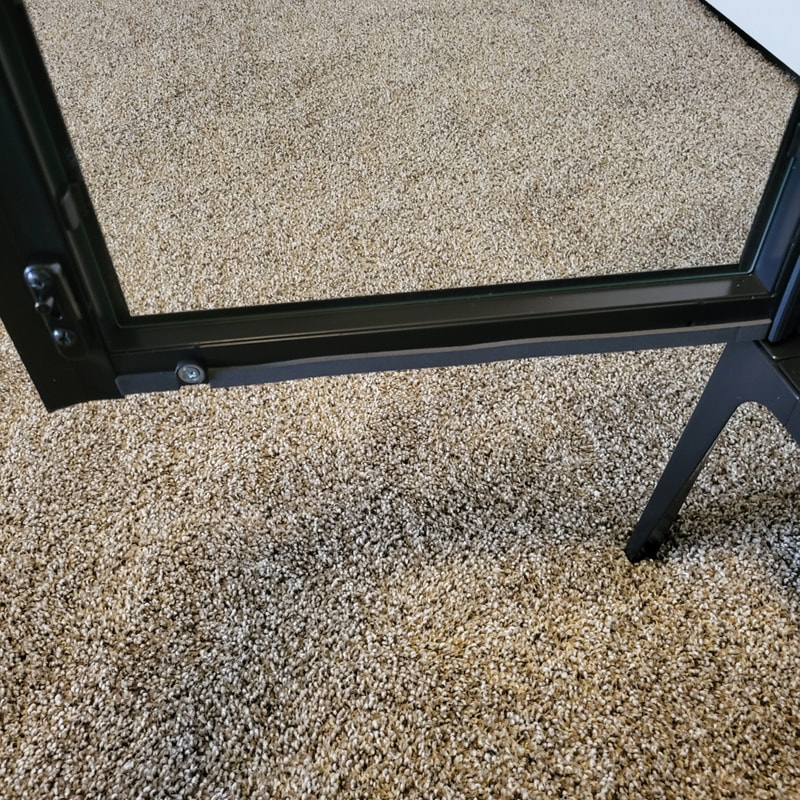
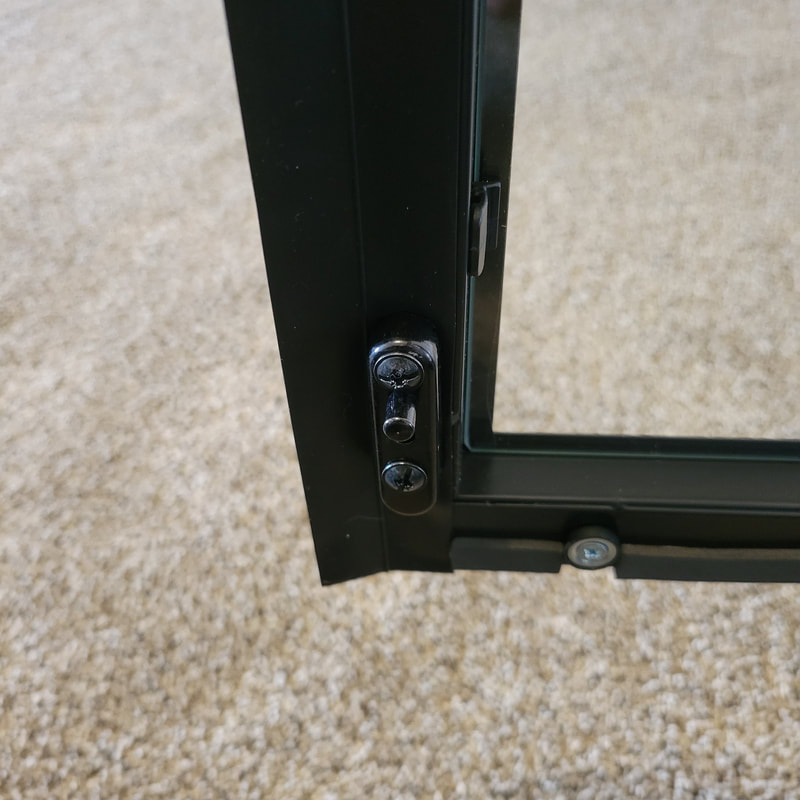
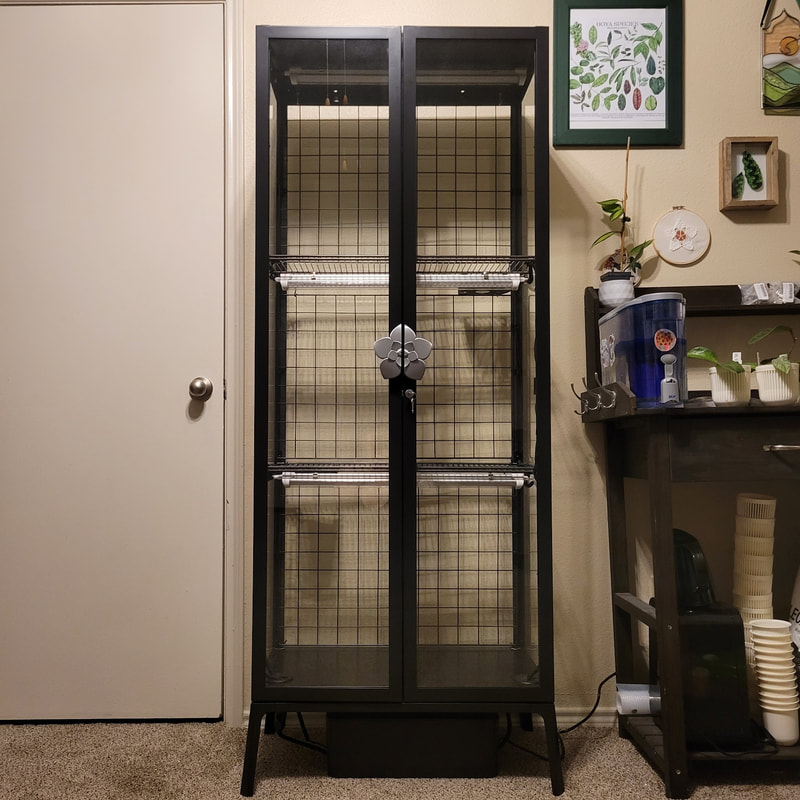
I put the silicone door seal flap on the left door before screwing on the handles and locking mechanisms that way it sits flush. Additionally, I used a hairdryer to make sure the adhesive sticks better by heating it up for a minute. You can also clean with alcohol before applying the strip to get a good seal. I applied the seal on the left door intentionally because I'm right-handed. With this type of weatherstripping you do have to make sure to close the one door before the other every time you open the cabinet. When I applied the teardrop silicone door seal to the sides of the doors, I made sure to face the tip of the teardrop towards the inside corner of the doors. The foam weather strip I applied to the top and bottom edges of both doors. Click here to watch a video of the finished weatherstripping. WEATHERSTRIPPING SUPPLIES: Foam Weather Strip Tape (top/bottom of doors) Teardrop Silicone Door Seal (sides of doors) Silicone Door Seal Flap (front door gap)
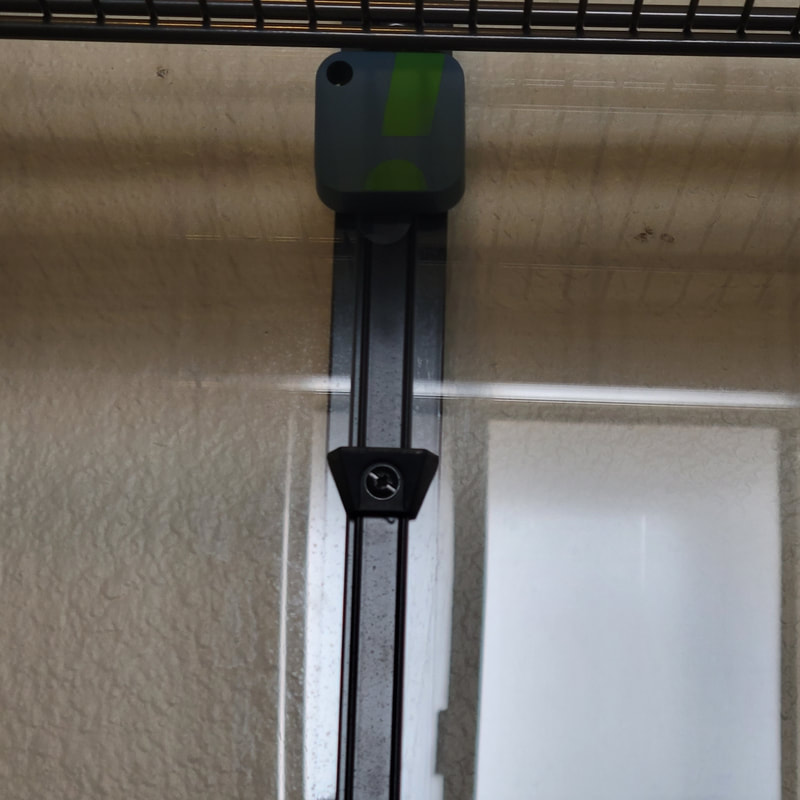
The hygrometer I attached to the back wall of the cabinet using clear 3M adhesive. Set up directions were easy to follow using the required app. The 3D printed plastic door handle covers just slid over the existing metal door handles.
Click here to watch a video of my complete build.
0 Comments
|
Archives
March 2024
Categories
All
|


 RSS Feed
