|
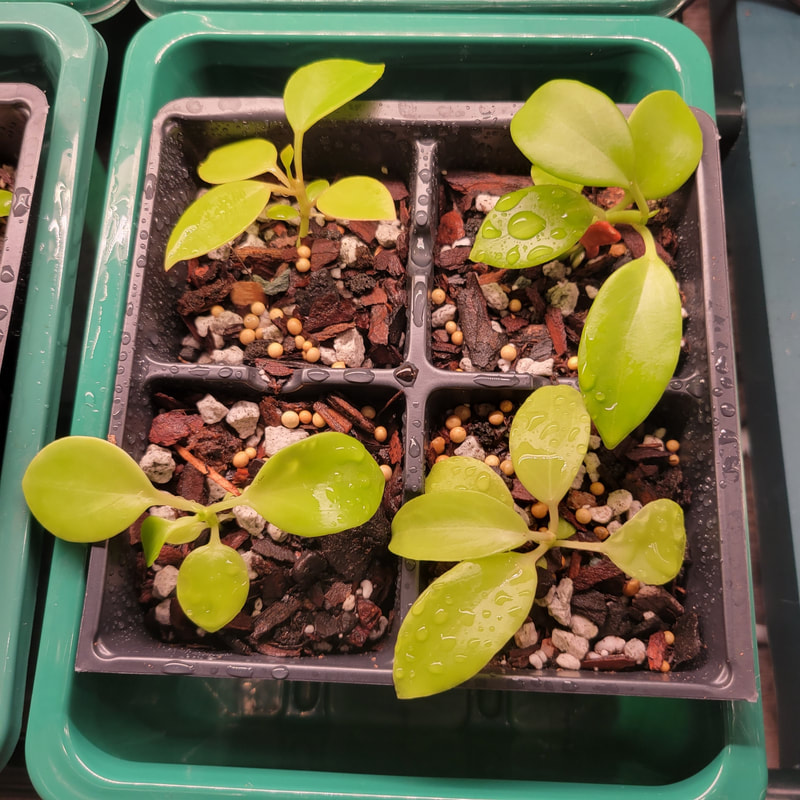
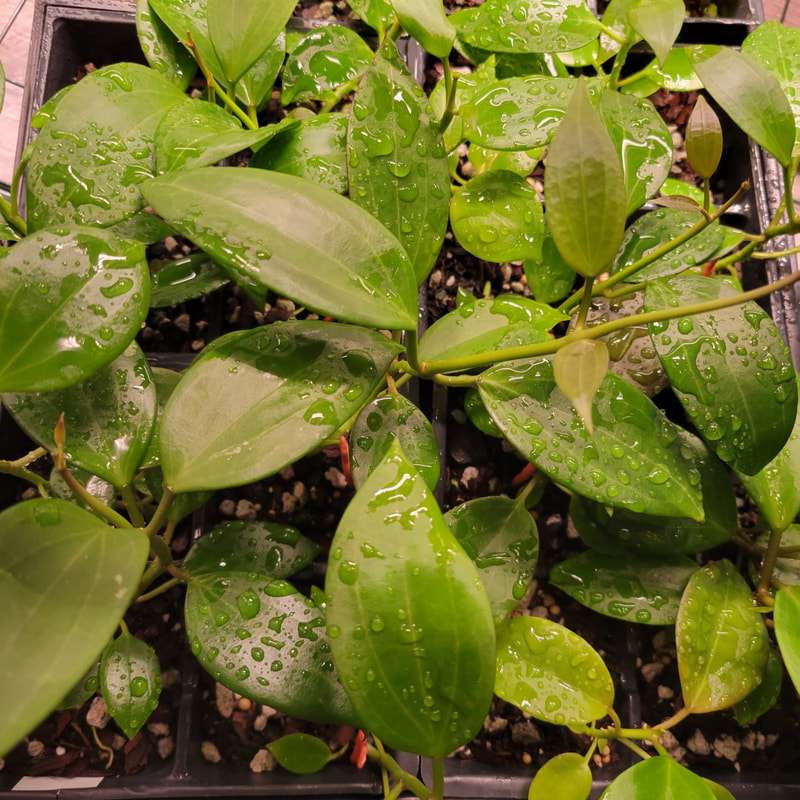
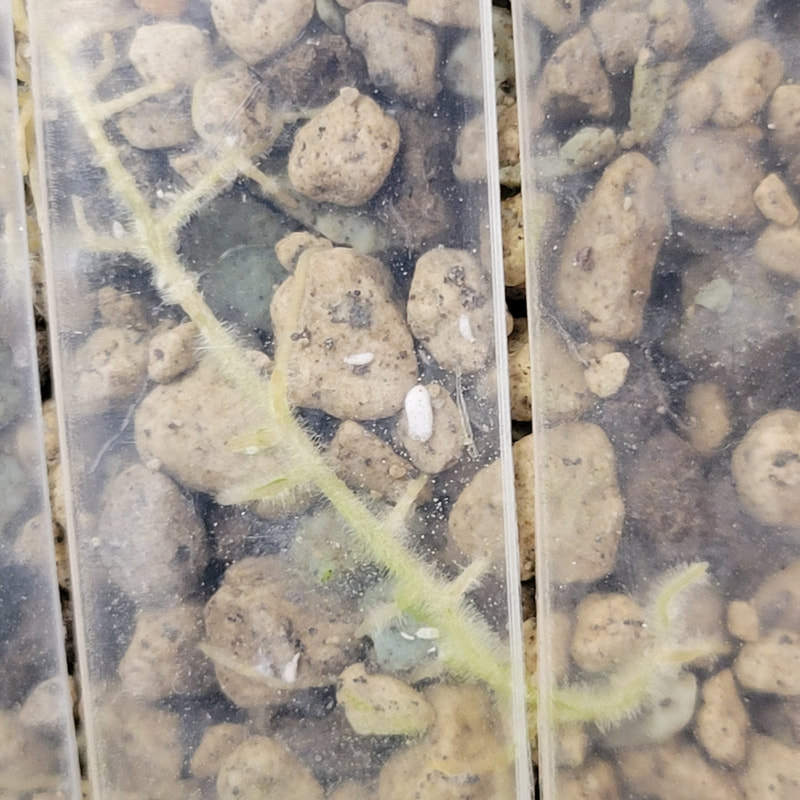
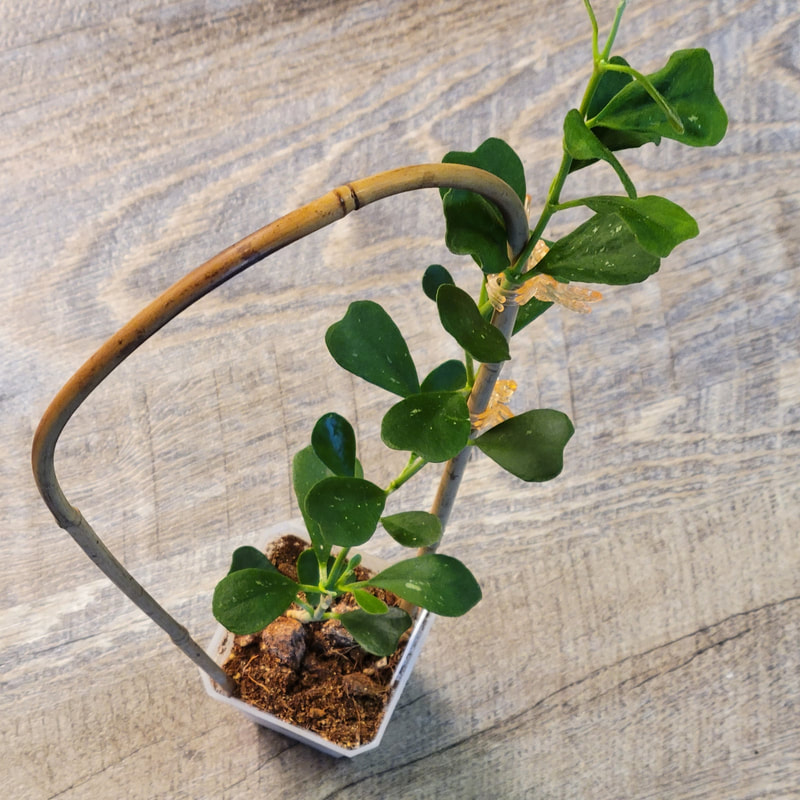
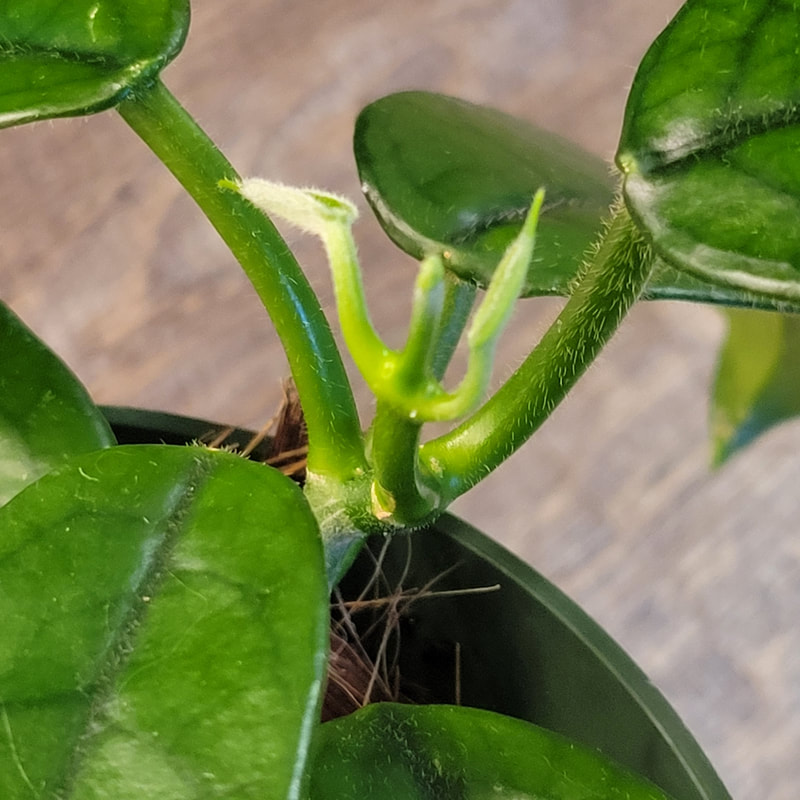
Two and a half weeks ago I noticed my Hoya DR. IBOK seedlings weren't looking very developed for being sown on 05/09/2022. Luckily, the cell trays I had the seedlings in were clear so I pulled them out of the cache tray and saw white fuzzy root mealybugs all over the root systems of the seedlings. I tossed all the soil and rinsed the roots and leaves really well in hot water. I picked off any remaining pieces of soil particles from the roots before spraying them down with my alcohol spray. Alcohol spray: 1/2 cup isopropyl alcohol 70% 4 cups water Since that initial discovery I have treated with neem oil, more alcohol spray, and systemics. The cell trays I planted them in the second time are not clear so I am unable to check on the roots. However, I have noticed that the seedlings have put on new growth and are definitely back on track. I even added in some Osmocote fertilizer. I will continue to monitor them for root mealybugs as they grow but hopefully, they are taken care of. I was not comfortable chopping the roots since they are seedlings and I didn't know if they could survive that at this point. Thus, the chances of root mealybugs coming back are definitely higher. The life cycle of root mealybugs does slow down as the weather gets colder so hopefully that will be to my benefit with it being August already. before
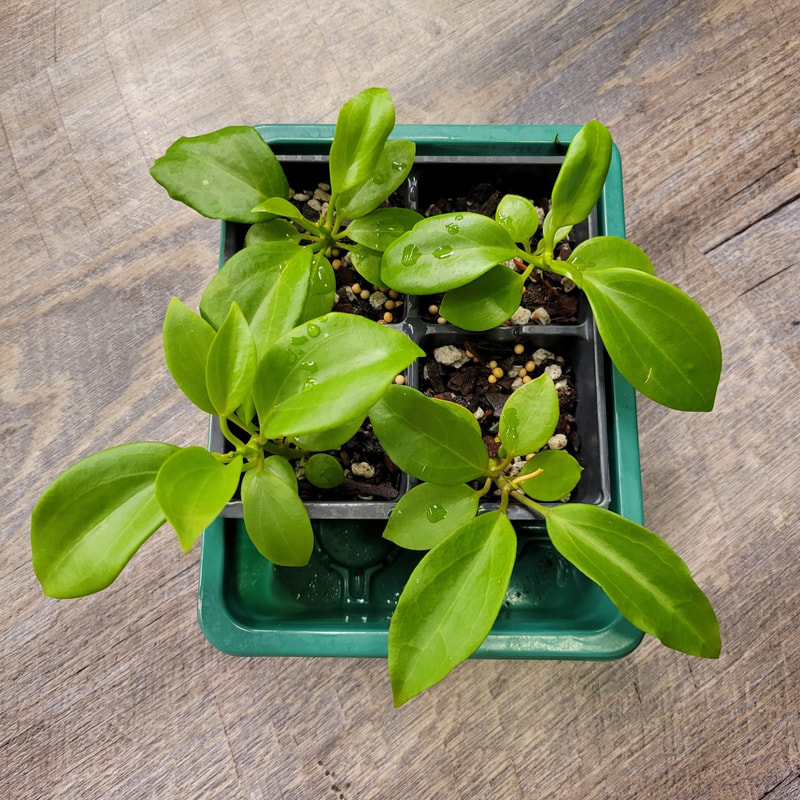
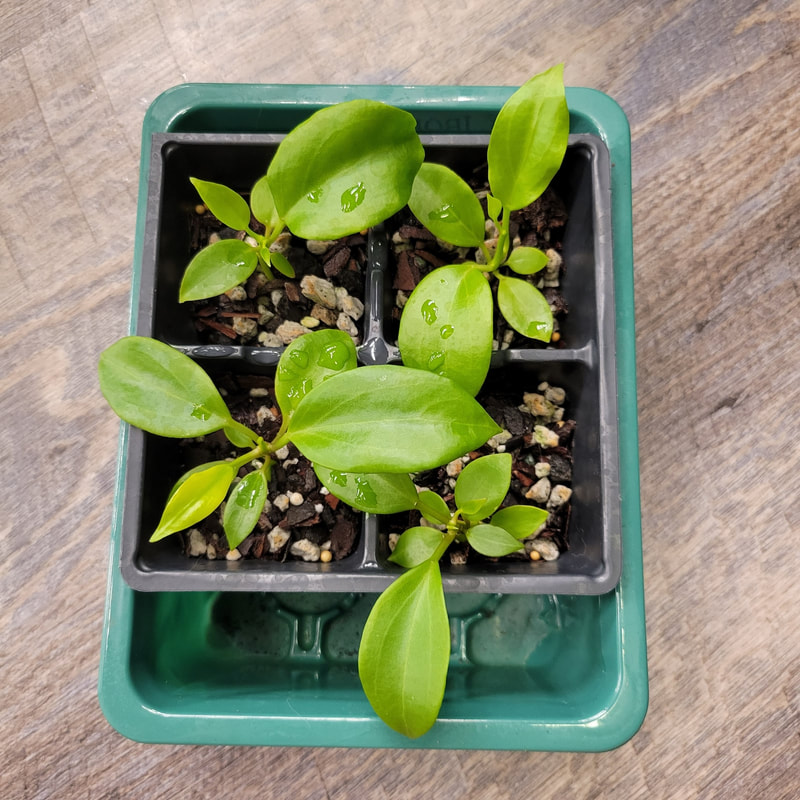
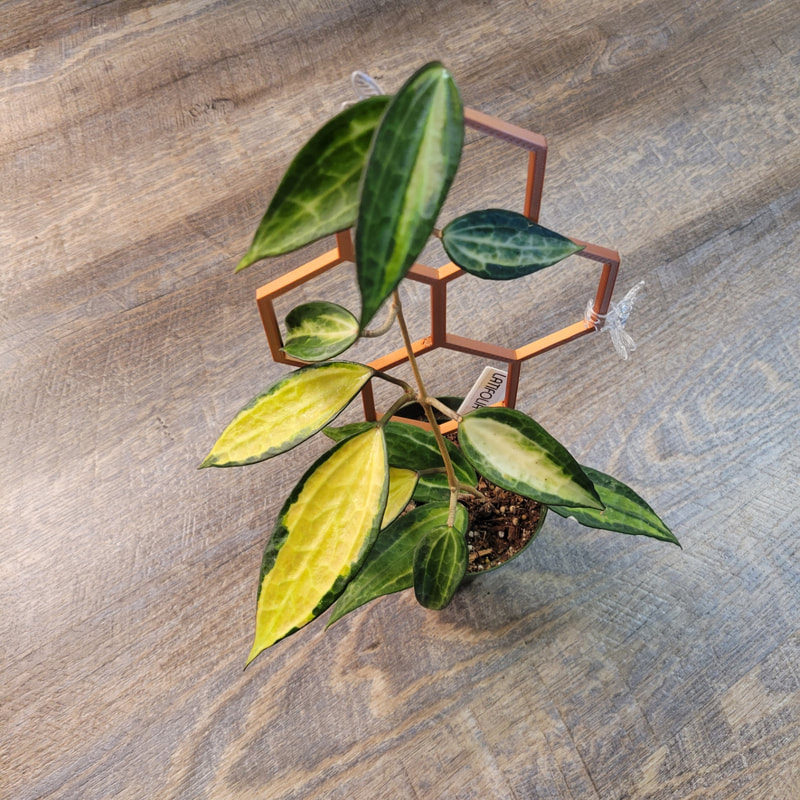
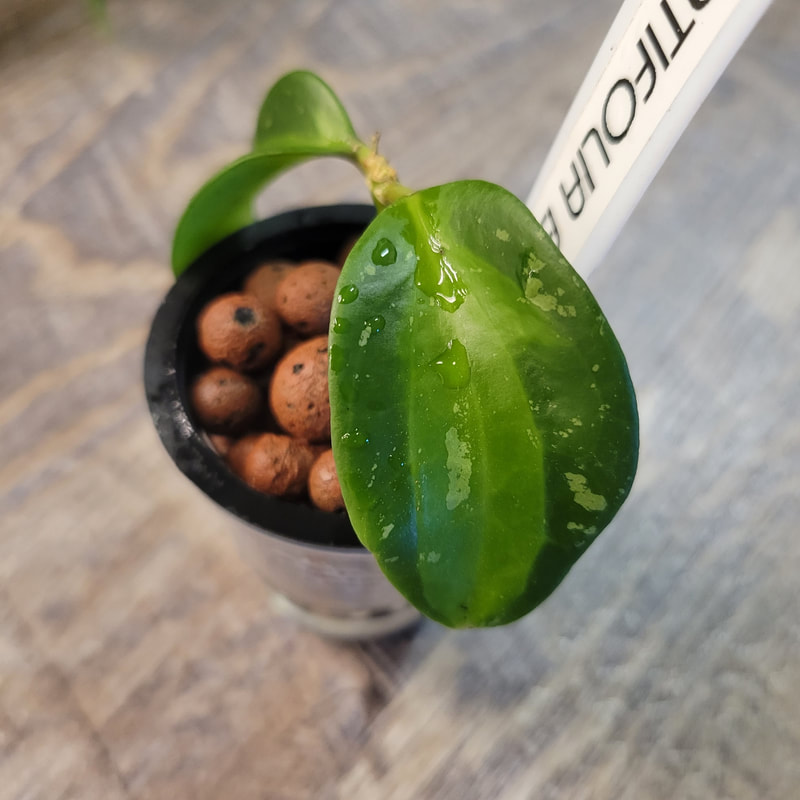
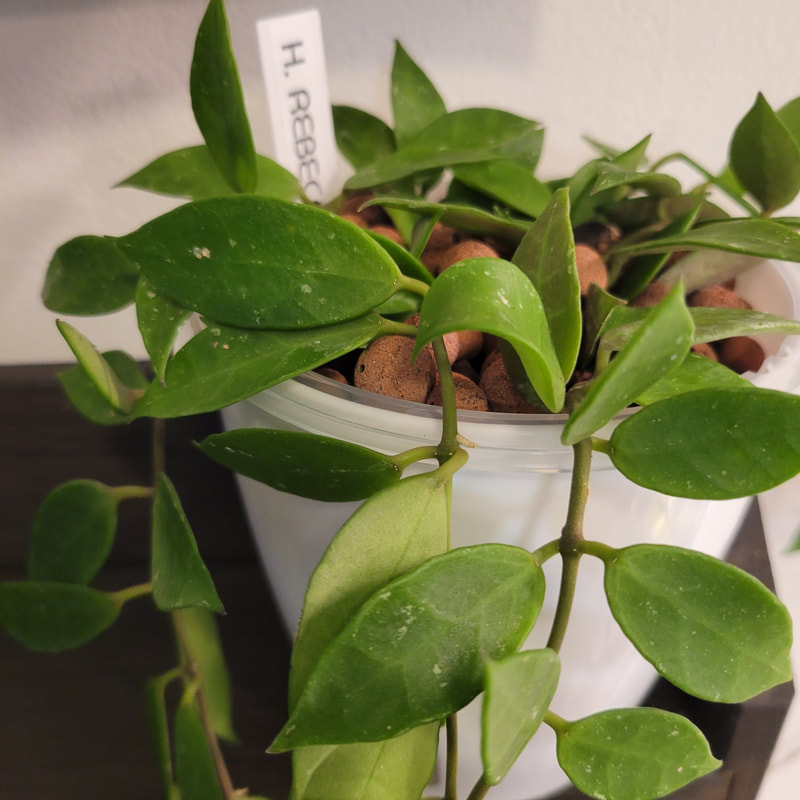
AFTER
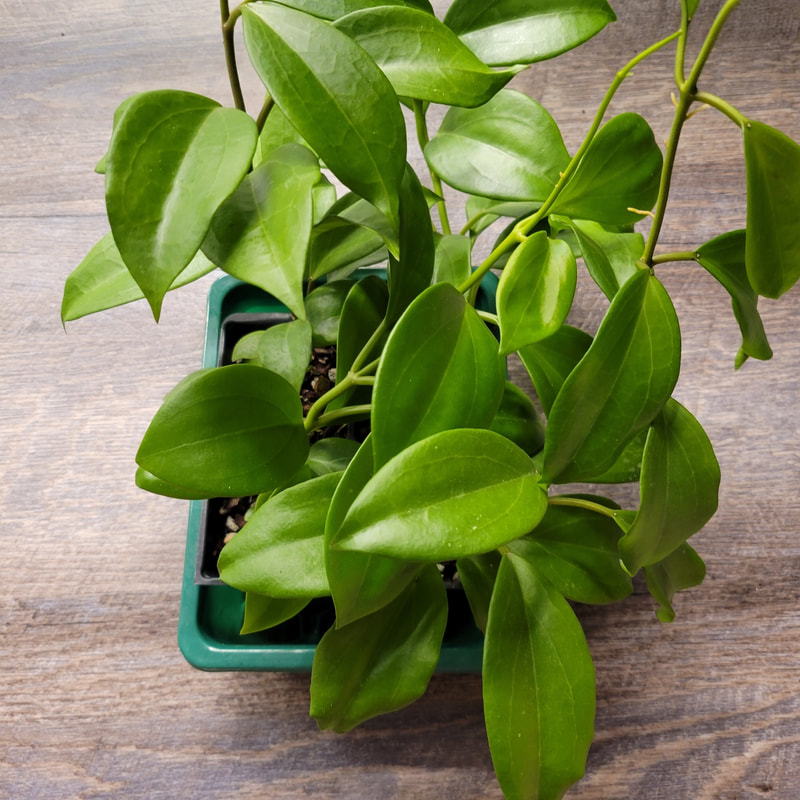
UPDATE 09/22/2022 I have not had to do any additional treatments on these seedlings since the initial infestation. I checked the roots on all of the seedlings and they are looking really good. They have continued to explode in growth. Something important to note is that root mealybugs can easily move from plant to plant through drainage holes so if you get an infestation make sure you aren't sharing the same water between plants and have some sort of tray around it to catch any water if your trays or pots have drainage holes.
0 Comments
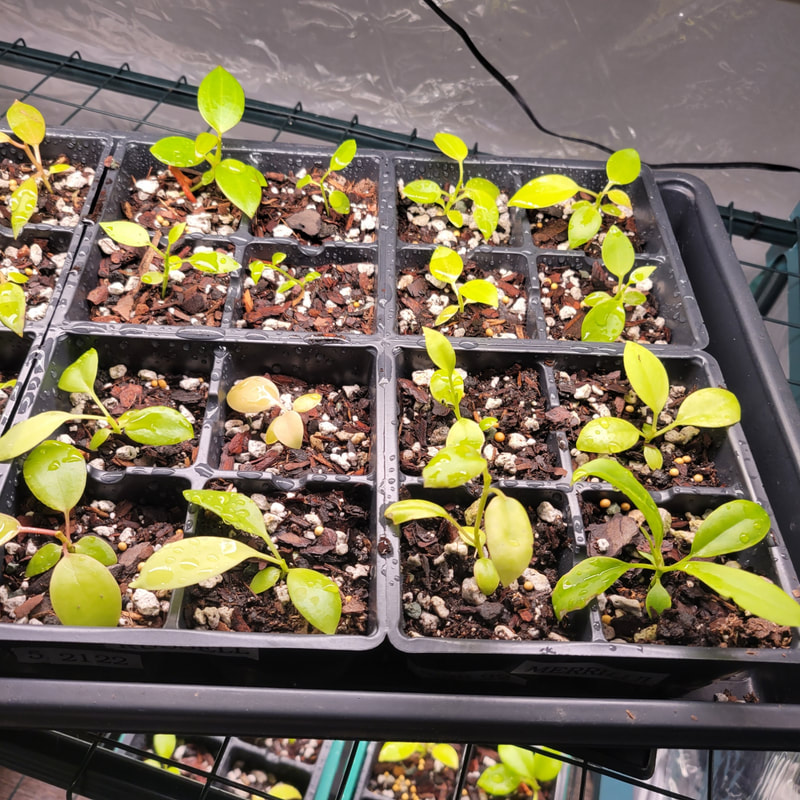
I went a little seed happy this year. I started growing seeds this year at the end of April and since have been growing latifolia, quinquenervia, Dr. IBOK, finlaysonii, incrassata, merrilli, fitchii, 'Penny's Treat', versteegii, and papaschonii. The only seeds that didn't take at all for me were obscura. There is something so rewarding about growing Hoya from a tiny seed to something lush and beautiful. Some of my earlier seeds are already getting decently large. One thing I think that some people don't realize when growing seedling is just how much water they need. From my experience the more mature they start to get the more water they require. I also experimented with starting my fertilization earlier than last time. Once I noticed a seedling starting to put out 4-6 larger leaves, I sprinkled in a couple Osmocote balls.
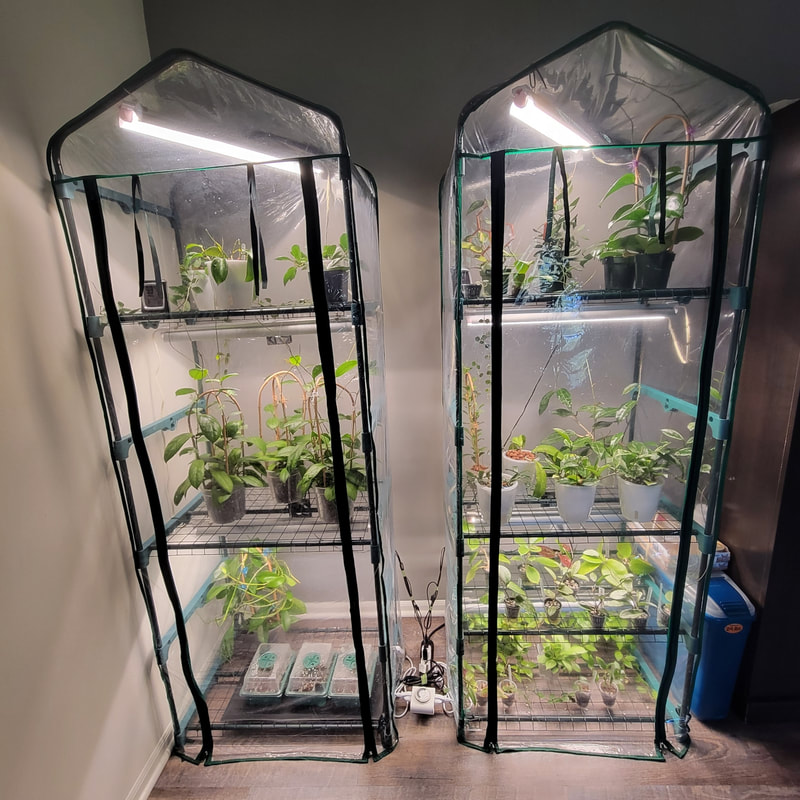
Additionally, last year I struggled with some of my seedlings getting elongated since they were not close enough to the lights. I adjusted my Barrina T8's and have them hanging 9 inches from the bottom of each shelf. Initially, I had the lights a little lower but I noticed some leave burn. I still had a few seedlings become elongated with the lights at 9 inches but that was easily remedied by repotting them deeper into the seedling tray cells.
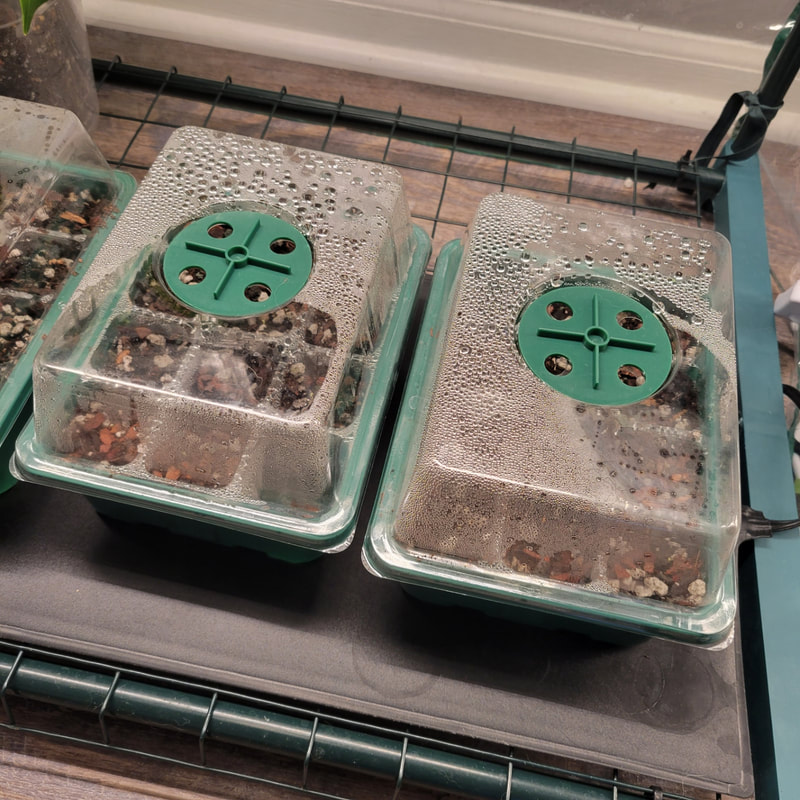
This year I have run into a problem with my DR. IBOK seedlings. The other day I noticed they seemed to not be as far along as I was expecting based on when I planted them. I checked the clear cell trays and noticed root mealybugs (ugh). Another plant had them that was hanging above my DR. IBOK tray and unfortunately mealybugs can travel through drainage holes and infest other plants. I immediately tossed all the soil and rinsed the roots and leaves really well in hot water. I picked off any remaining pieces of soil particles from the roots before spraying them down with my alcohol spray. Alcohol spray: 1/2 cup isopropyl alcohol 70% 4 cups water Unfortunately, because the seedlings aren't super mature, I didn't feel comfortable cutting off the roots and trying to reroot them. With root mealybugs your best bet to avoid them coming back involves chopping the roots. I am hoping that I did enough to help salvage them so they will continue to grow. I repotted them into fresh soil and have them quarantined in their own little cache box just in case the mealybugs do rear their ugly heads again. Click here to read more about root mealybugs.
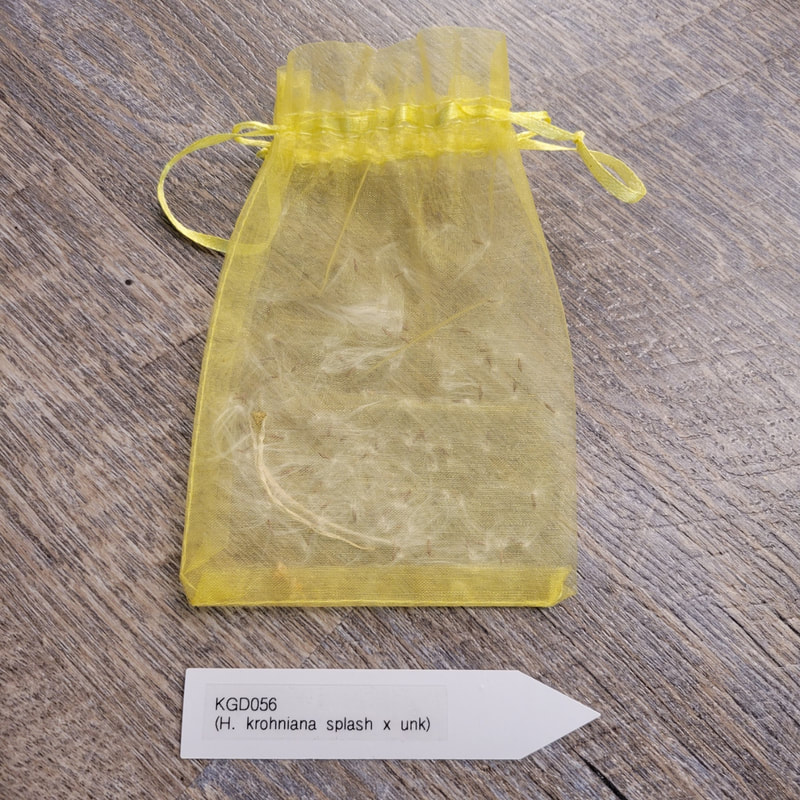
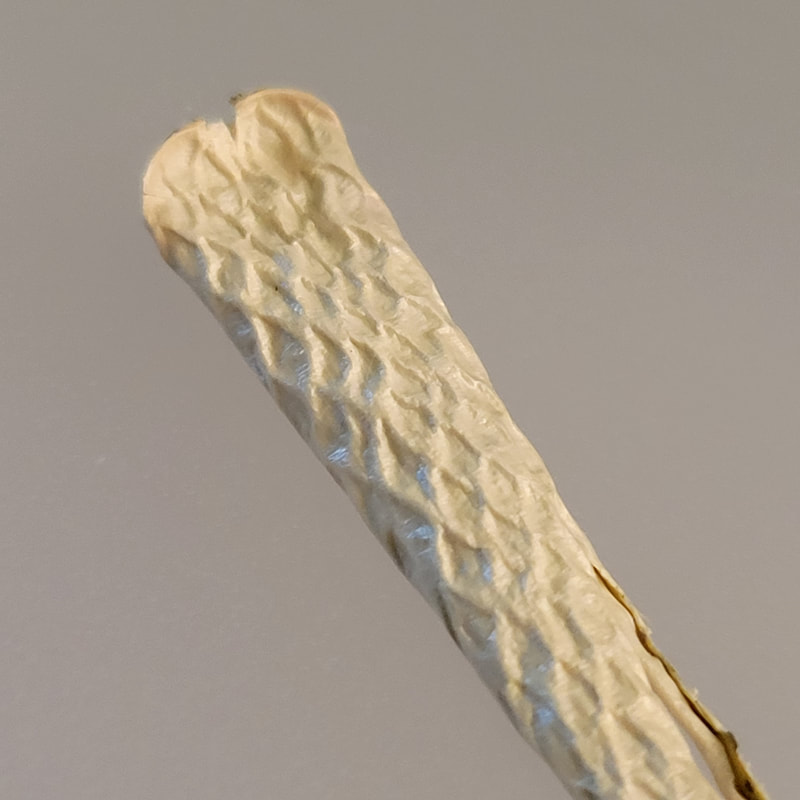
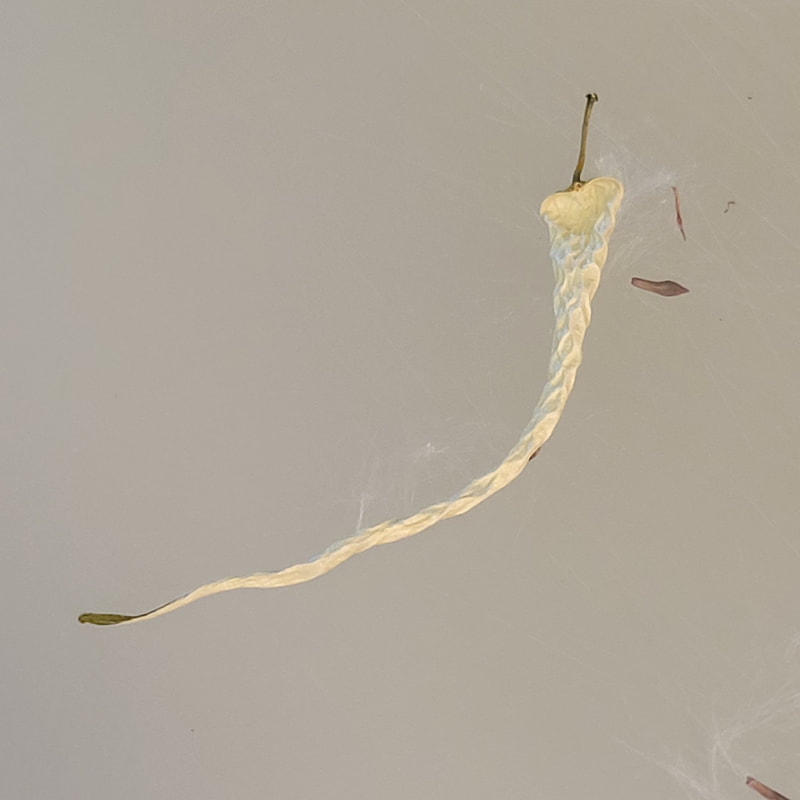
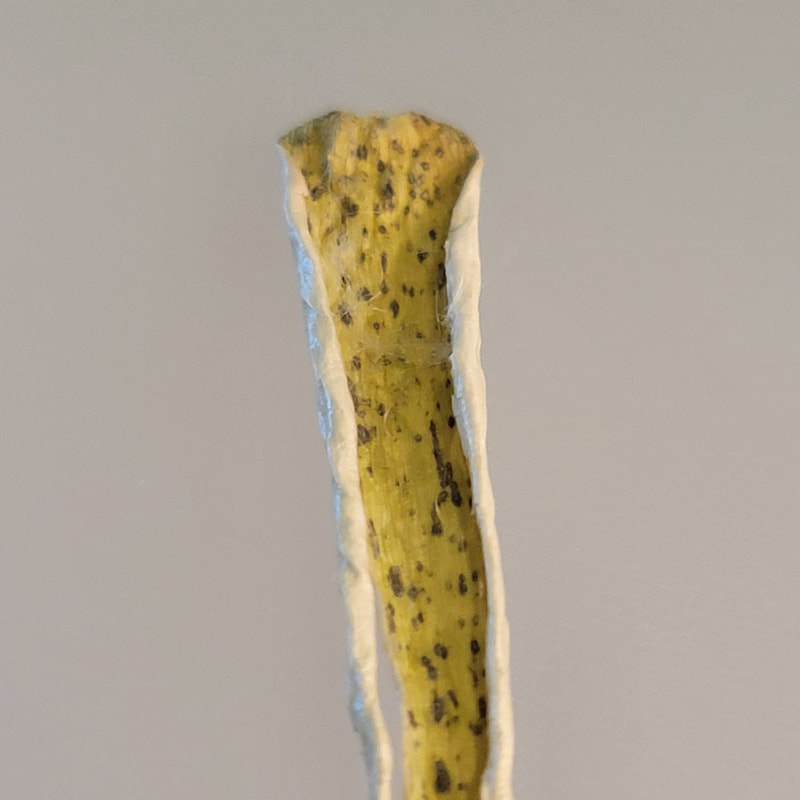
I have not been lucky enough to have any seed pods on my own Hoyas. I grow all my Hoyas indoors and there are no pollinators in my tents. The next best thing to growing my own seed pod is to procure one to experiment with. As usual, Kirsten Dyer from Small Batch Tropicals came through for me. I was able to get a H. krohniana splash x unknown seed pod from her. Sadly, the seed pod itself was mostly dried up when it came in the mail. I would love to see how a fresh pod looks in person.
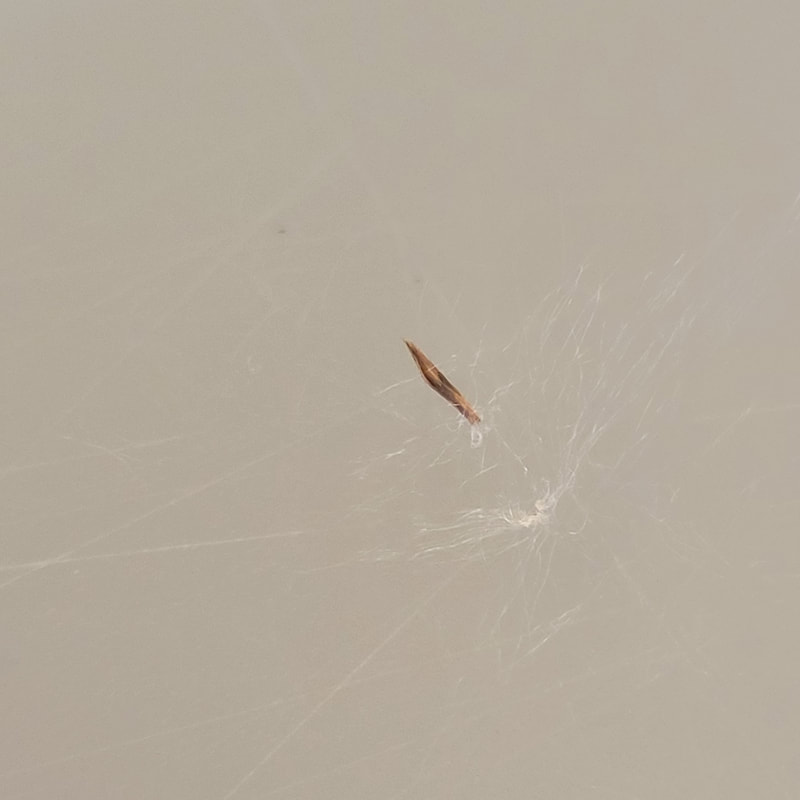
I wasn't 100% what all goes into getting a seed pod ready for market. I watched a few videos from people I consider prominent Hoya growers such as Doug from Vermont Hoyas or Ric Morier. It seemed like they didn't separate their seeds at all but just planted them straight away fluff and all. The fluff or seed head (if I have my terminology correct) is like a spider web you cannot get off your fingers that traps the seeds.
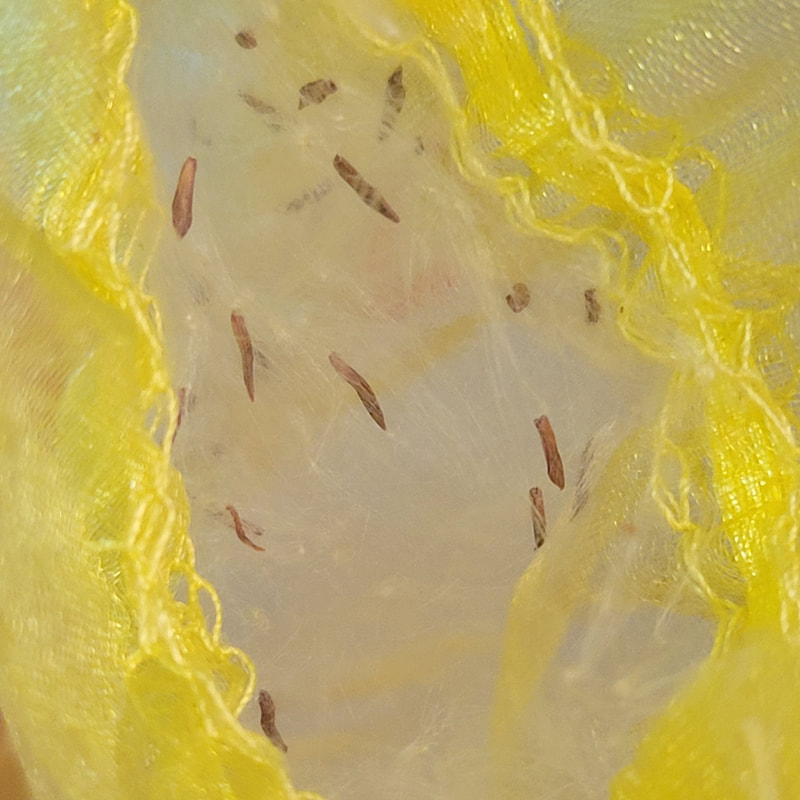
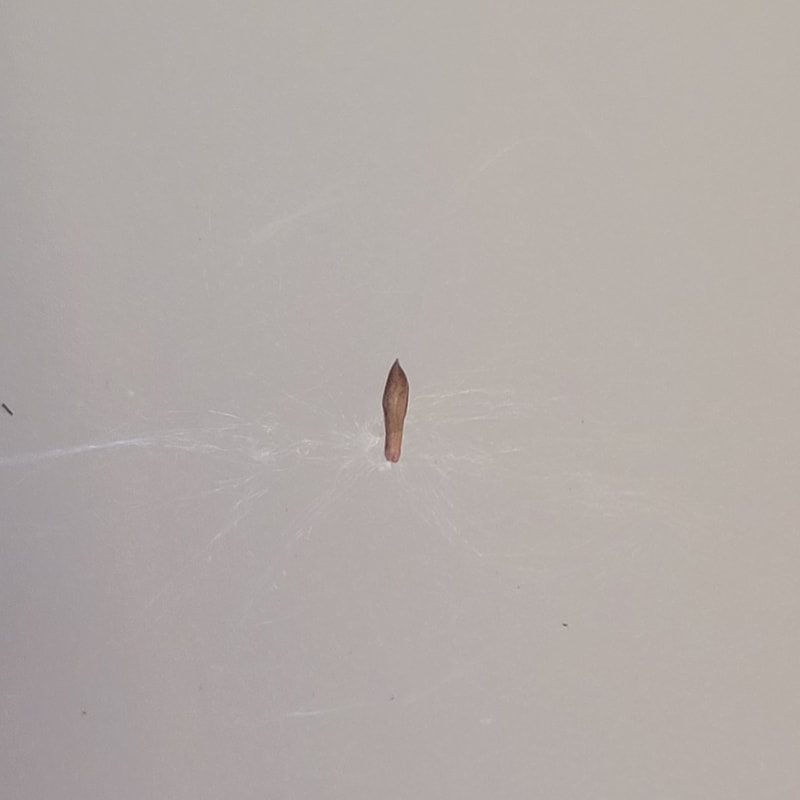
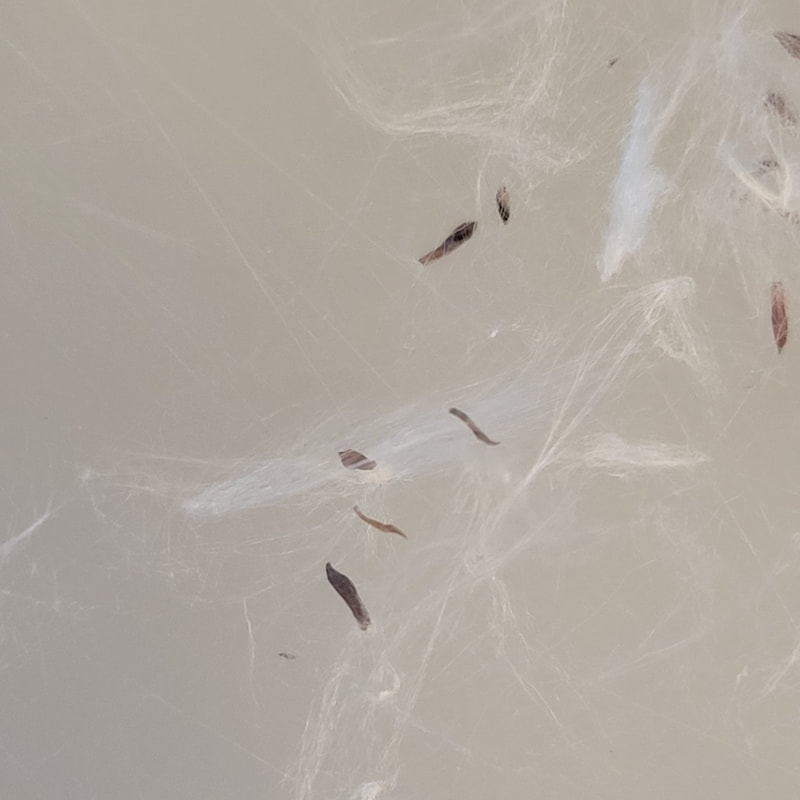
From the seeds I observed in the mesh bag, some of them were very plump and arrow shaped while others looked dried out or very thin/straight. My assumption is that the thin dried out seeds are most likely duds. However, I have heard that sometimes seeds like these are still viable so I planted all my suspected dud seeds to see if I get any seedlings.
In short, it isn't necessary to remove the fluff but more of a personal preference. I've planted seeds both with fluff and without and it doesn't seem to make a difference. I think sorting seeds is definitely a good idea especially if you plan on selling them. Seeds for personal use don't really need sorted unless again it comes down to your personal preference.
07/21/2022 - Dud Update The suspected dud seeds did not sprout. I'm sure this isn't the case for all Hoya seeds but for this pod my prediction was accurate. I have made a few more changes to my fertilizer line up since September so I figured I would do another update.
Semi-hydro (LECA / PON) plants: - Stopped using Osmocote - Still using Cal-Mag - Started Fox Farm Cultivation Nation (3-part liquid fertilizer) The cultivation nation can be used in soil or semi-hydro. Click here to access the feeding charts. I use the semi-hydro dilution chart in BOTH my semi-hydro and soil plants. Note that the diluted strengths of the feeding charts differ between semi-hydro and soil. I like how the feeding chart takes in account the use of the Cal-Mag. Soil plants: - Still using Osmocote - Still using Cal-Mag - Started Fox Farm Cultivation Nation (3-part liquid fertilizer) - Stopped Grow Big fertilizer I did like the Grow Big fertilizer but I stopped using it because I didn't want to be using too many products and risk fertilizer burn. Click here to read about my previous fertilizer update Sep 2021 . Click here to read about my previous fertilizer update May 2021 . I have been saying for months that I was going to downsize my collection. At the height of my collecting, I had over 300 Hoyas contained within 3 grow tents. It was a thrill to be receiving multiple packages a week each with a new Hoya to add to my collection. There really are so many interesting ones to buy. However, it became harder to enjoy my plants because I was always trying to keep up with the maintenance. Being able to properly attend to my plants and enjoy them is really important to me in this hobby. I finally have been able to keep the ones I love and sell the ones that I can live without. Currently, I have about 45 Hoya's in my collection give or take a few. It feels so great! I think the lesson I learned is to not get caught up in having to have the latest/greatest and nurturing what I have.
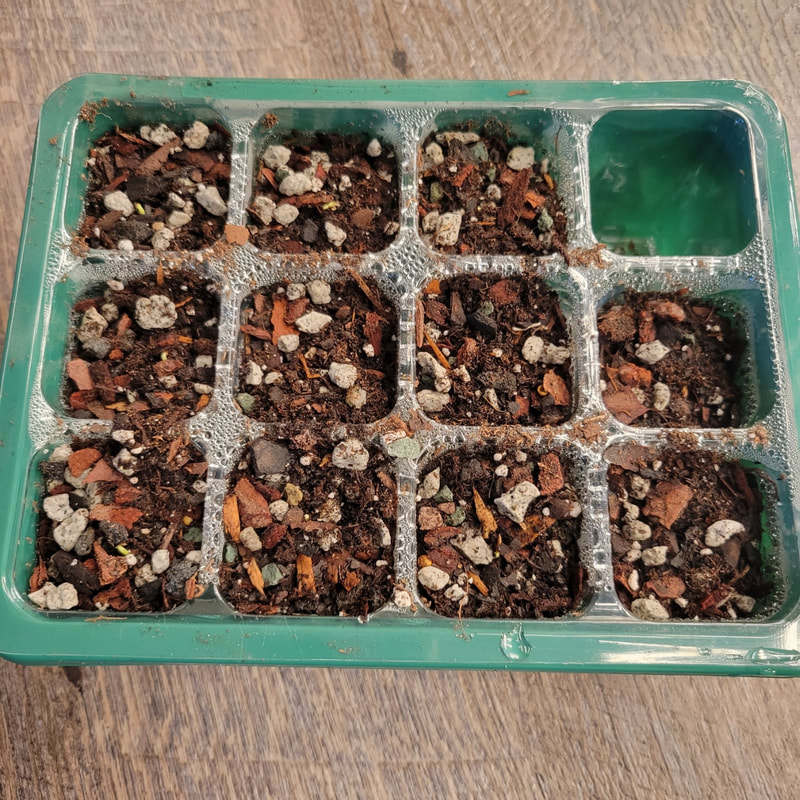
I've even been able to take out a few shelves so now my plants have more room to grow! I'm really enjoying having bigger more mature plants. Sometimes I still get the urge to cut them back but I talk myself out of it. Don't forget to enjoy the hobby and your plants. Podcast Listening Reccomendations: Bloom and Grow Radio Episode 43 Your Brain on Plants Potted Together Podcast Overconsumption of Plants Last year I tried sowing Hoya seeds for the first time. It was definitely a learning experience but a very positive one. This year I wanted to up my game and invest in some seedling trays.
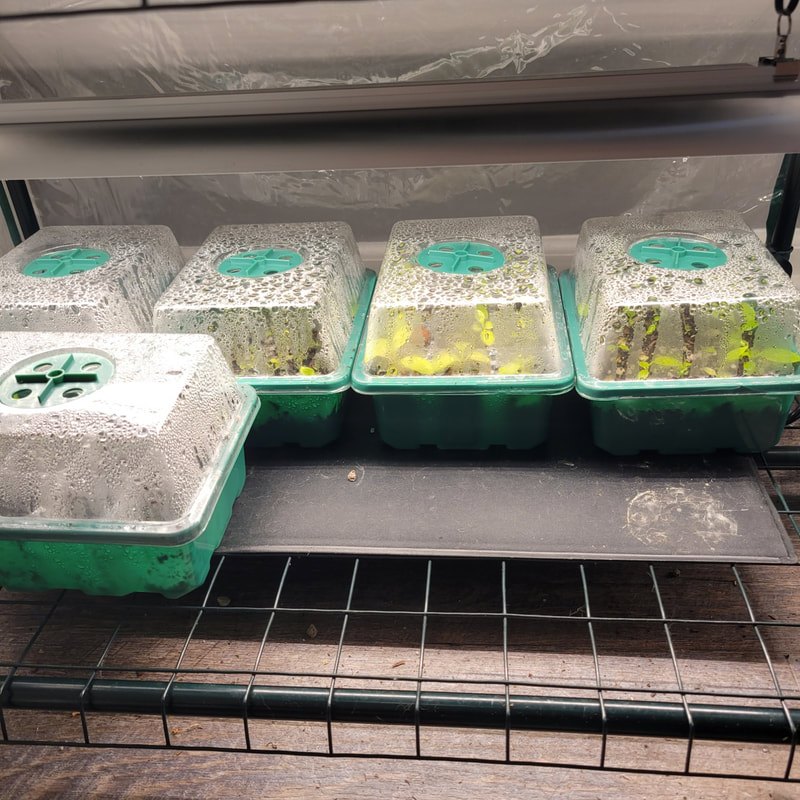
I started off by filling the cells almost to the top with soil. I would recommend not filling it quite as high so the seedling has more room to grow taller. The soil mix I used can be found by clicking here. Then I used a wash bottle to wet the soil. The soil should not be drenched. Next, I carefully placed a seed in each cell. After that, I put a very thin layer of soil on top and dampened it with a sprinkle of water. These trays come with a ventilated dome which I placed on top. Lastly, I placed the tray on a heat mat under a grow light. I will periodically (every few days) check the soil to make sure it stays moist. If you do grow Hoya from seed, make sure to sow them ASAP while they are still viable. Do not buy fake seeds from any big corporations. The best place to find Hoya seeds is on the different Facebook Hoya groups. My personal favorite is Small Batch Tropicals.
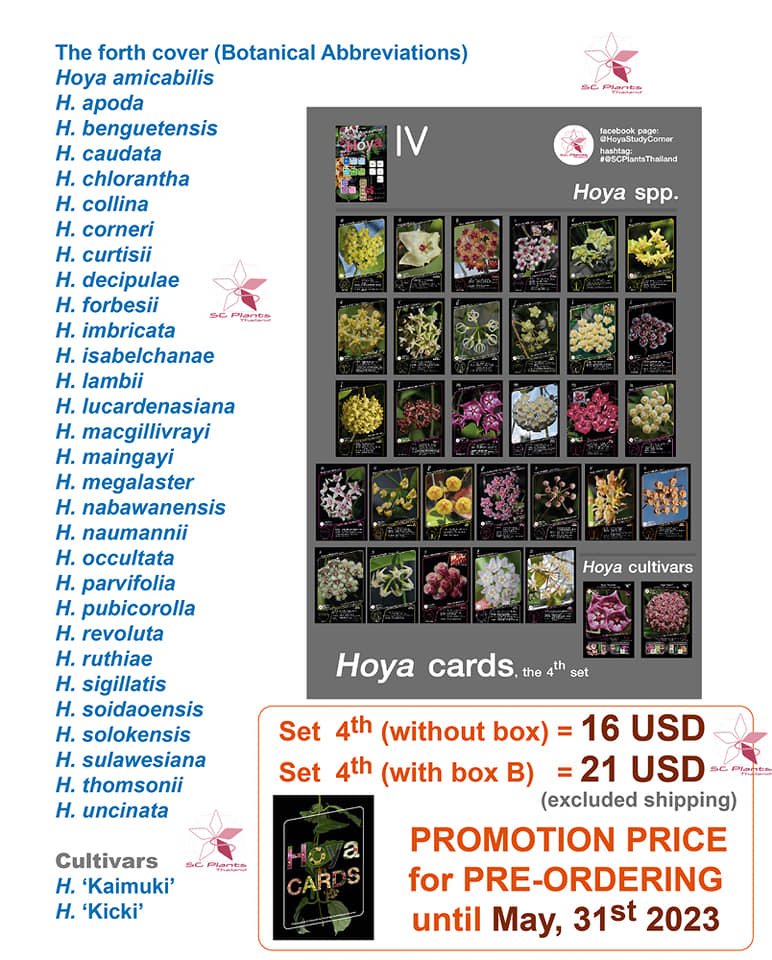
Click here to check out the video I made sowing H. latifolia seeds. One resource that I absolutely love for more in depth information on specific Hoya species is A Hoya Study Corner by SC Plants. They regularly post content on their Facebook page as well as periodically sell Hoya cards that are chalked full of information. If you can snag a set of cards I would definitely recommend it. They do ship from Thailand so it takes a little bit of time to ship.
SC Plants. (2021). Hoya cards first set. A Hoya Study Corner. Retrieved April 7, 2022, from https://www.facebook.com/HoyaStudyCorner/photos/1909851605849541.
SC Plants. (2021). Hoya cards second set. A Hoya Study Corner. Retrieved April 7, 2022, from https://www.facebook.com/HoyaStudyCorner/photos/1909851565849545. SC Plants. (2021). Hoya cards third set. A Hoya Study Corner. Retrieved April 29, 2022, from https://www.facebook.com/photo?fbid=472506791296960&set=a.457755986105374. SC Plants. (2021). Hoya cards fourth set. A Hoya Study Corner. Retrieved March 13, 2024, from https://www.facebook.com/photo/?fbid=757829222764714&set=pcb.757829349431368.
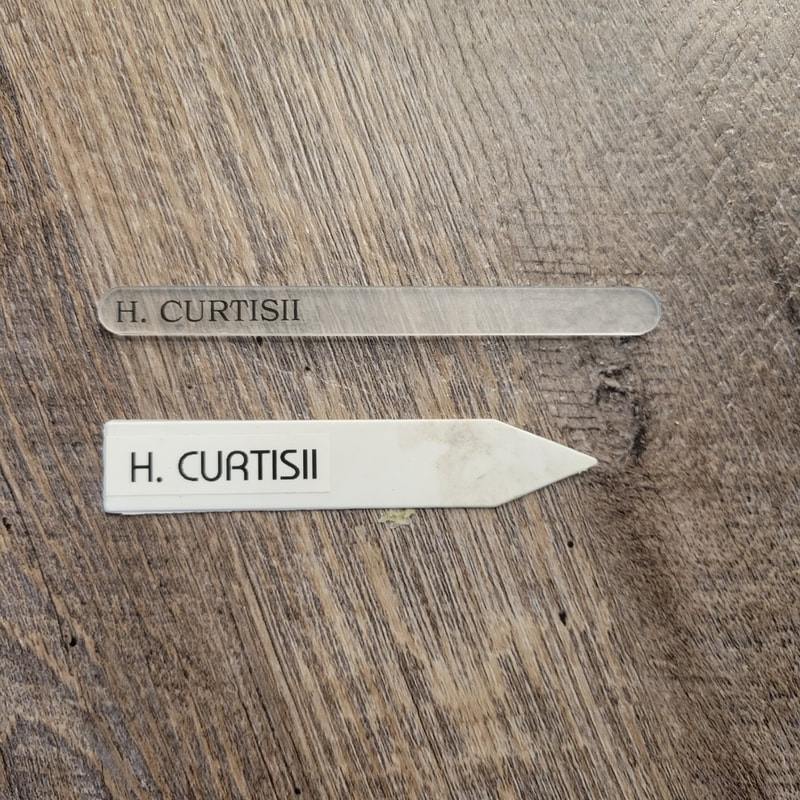
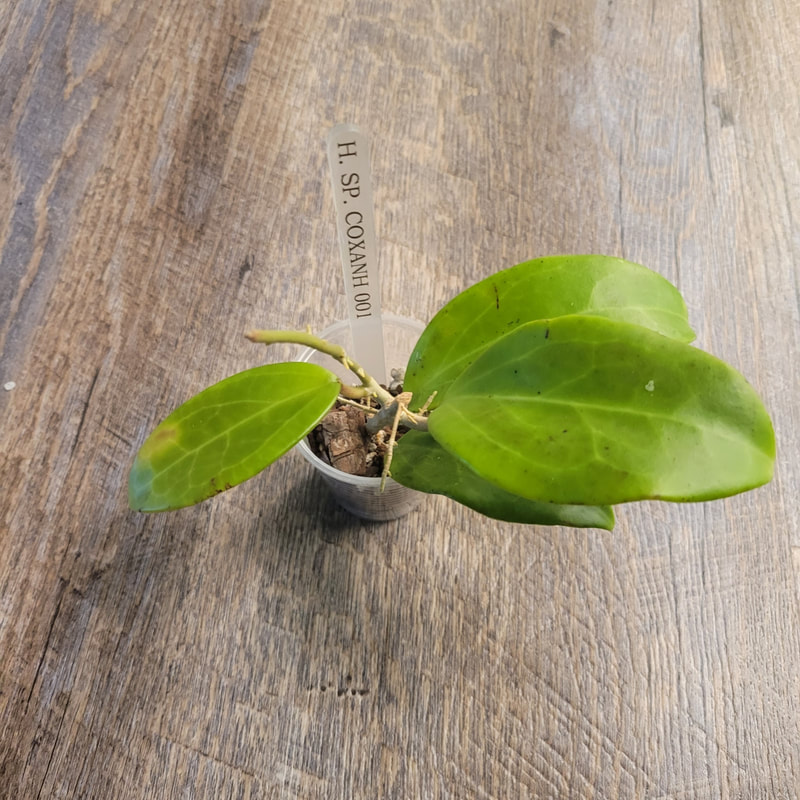
The plant tags that I gravitated towards for most of my collecting time has been plastic ones. They have a point on the end and work well for their purpose. Unlike wood tags, plastic ones will last longer and not mold or rot. I would definitely recommend using these if you have a lot of plants and are looking for a cheap but durable option that costs roughly 6 cents per tag if you buy a pack of 200. To make my plant tags I use the Brother P-touch PTD210 which is a really affordable label maker. I had initially bought a DYMO LM160 but it didn't work straight out of the box and the problem was a known issue for this particular machine. For label tape, I recommend not buying the Brother brand tape due to cost per roll. I have been using Labelife which makes their own cartridges that you can buy for a reasonable price in bulk. The tape quality is the same as Brother in my experience. There are also other font color options (white, black, red, blue) as well as background color (transparent, white, black). Recently, I saw someone post about using acrylic engraved plant tags for their plants. I really like the idea of using clear tags. I ended up buying acrylic popsicle sticks. It is a pricier option at about 22 cents per tag. I do not have the capability to engrave my own tags so I decided to buy transparent tape for the P-touch. Another idea for writing on the acrylic is using an oil based Sharpie which is permanent but can be removed with acetone.
The acrylic popsicle sticks are about 0.5 inch longer than the plastic ones and thicker. It was harder to place it into pon but no issue with soil. The bigger the plant pot the easier I would assume it is to stay put. I did attempt to cut a V into the bottom of the popsicle stick but it was difficult cutting through the acrylic. Additionally, the label tape is slightly larger than the surface area of the acrylic so I had to cut it down once placed. I used a lighter to gently burn the edges after I trimmed down the sides of the tape.
Font settings used for the acrylic labels:
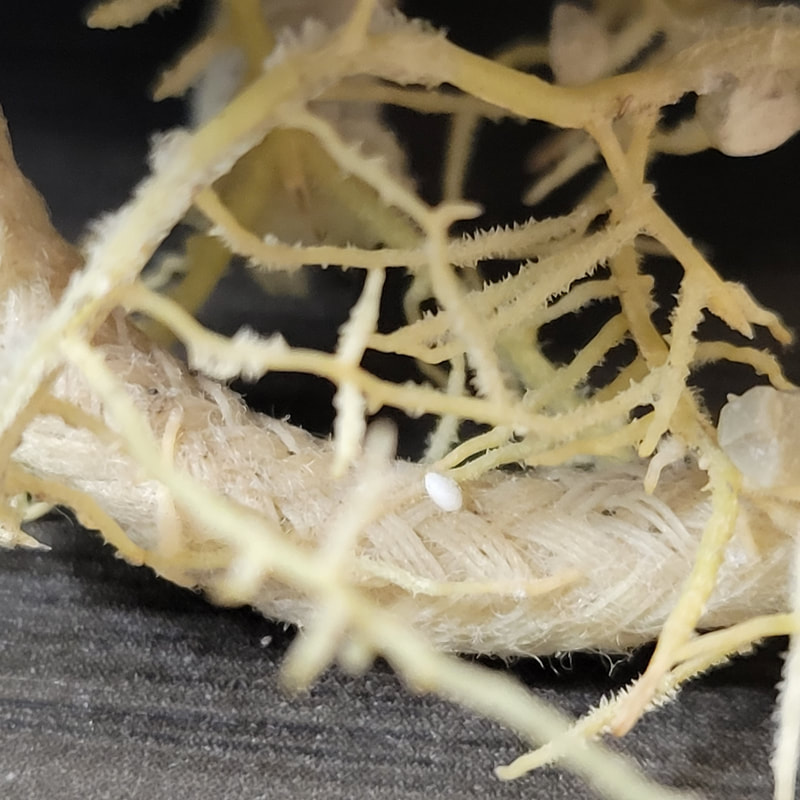
Root mealybugs are small rice sized white cotton-like insects that live in the soil of a plant. Instead of feeding on foliage sap like regular mealybugs, root mealybugs feed on root sap of the plant. It can be hard to initially spot an infestation, unless you are checking the roots. The main sign of a root mealybug infestation is an unknown decline in plant health. Declining plant health can happen for numerous reasons but it 's important to rule out root mealybugs.  UK houseplants. (n.d.). Root mealybugs. Root Mealybugs. Retrieved February 20, 2022, from https://www.ukhouseplants.com/pests/root-mealybug.
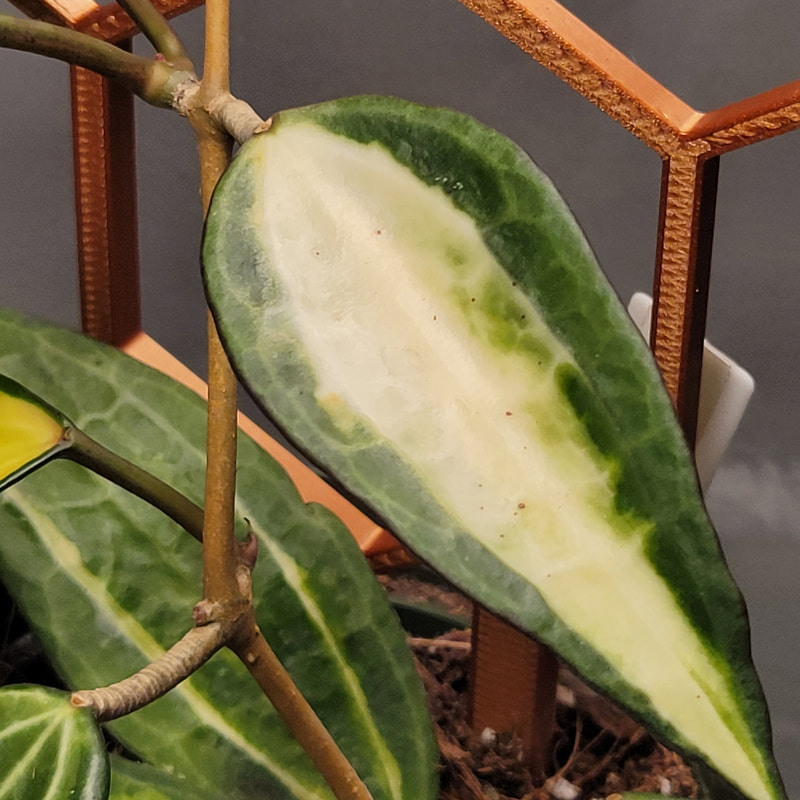
Root mealybugs are more dormant in the winter with the life cycle taking up to 4 months to get from egg to mature adult. In the summer, root mealybugs can mature from egg to adult in as little as a month. The white powdery areas in the above image show where the egg sacs are. Once the eggs hatch into nymph’s aka crawlers, the insects are ambulatory and spread easily. Do not use the same water between plants as nymphs can be transported via water. Due to the high mobility of these insects, it's recommended that you do not put any plants anywhere near an infested plant. Root mealybugs can be a vexing pest to deal with and can return after the infestation is gone. One method to dealing with root mealybugs is simply getting rid of the infested plants. Other methods include chopping the roots off completely and propagating, using systemic insecticides with the active ingredient imidacloprid, and soaking the roots in hot water. If you use the chop and prop method, I would recommend soaking the cuttings in alcohol spray solution for 10 minutes and using a soft-bristled old toothbrush to gently scrub down the stems/leaves. Do not reuse the same grow medium when repotting/propagating. Once potted up, add in systemic insecticide (granules or liquid). Note that using systemics is not a one-time application but will require periodic usage throughout the year. Alcohol spray: 1/2 cup isopropyl alcohol 70% 4 cups water The hot water bath method is effective if the temperature is 120F. To do this take the root ball of the plant and immerse it completely in the hot water for 10 minutes. This should be enough time to kill any living mealybugs on your plant. References: Hodgson, L. (2017, February 10). Root Mealybugs: Death From Below. Laidback Gardener. https://laidbackgardener.blog/2017/02/10/root-mealybugs-death-from-below/#:~:text=Root%20mealybugs%20are%20active%20all Bethke, J. (2013). Spring 2013: Hot Water Treatments to Control Pests. Ucnfanews.ucanr.edu; University of California, Division of Agriculture and Natural Resources. https://ucnfanews.ucanr.edu/Articles/Regional_Report_San_Diego_and_Riverside_Counties/Spring_2013__Hot_Water_Treatments_to_Control_Pests/ There are hundreds of different Hoyas available to purchase. Not to mention there are so many interesting characteristics between different varieties and new hybrids coming onto the market. I thought I would share some of my favorites.
H. manipurensis I absolutely love the shape of the leaves and find it to be unique among the Hoya genus.
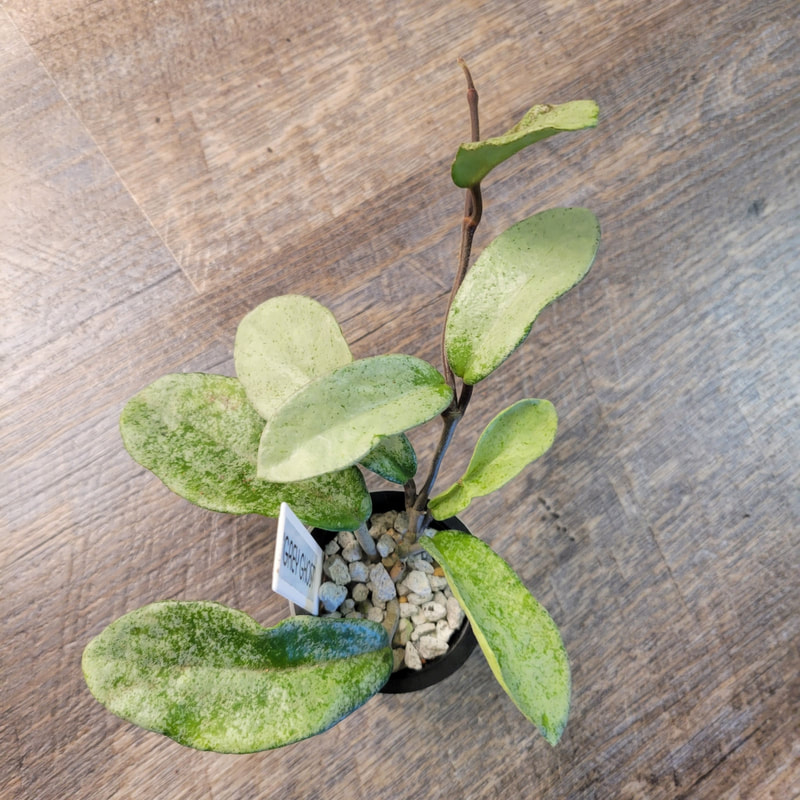
H. latifolia 'Pot of Gold' fka macrophylla This has been one of my all time favorites since I started collecting. The variegation between each leaf can vary greatly. Love the contrast of the leaves.
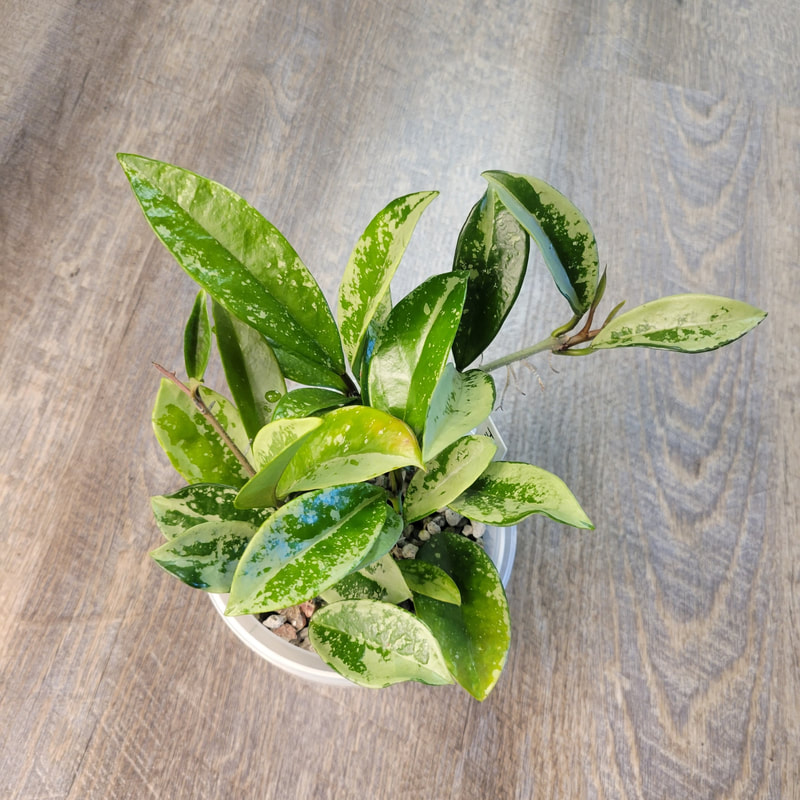
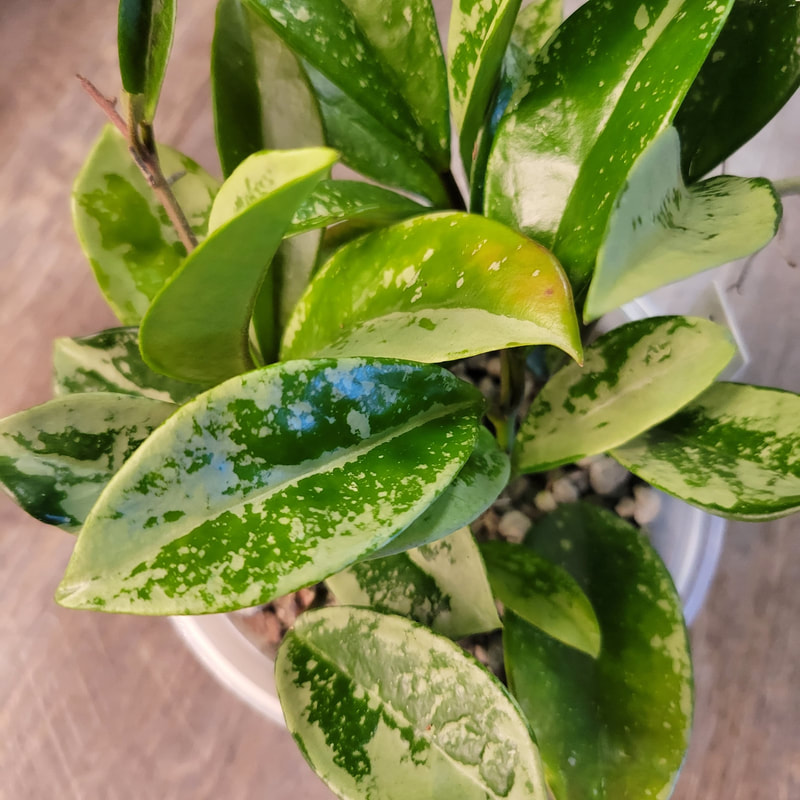
H. AH-074 Such a lovely sport carnosa. Carnosa's tend to be fast growers and this is no exception. There are two clones of AH-074, one that is almost all silver and a second that is green and silver. I love the way the green and silver look together.
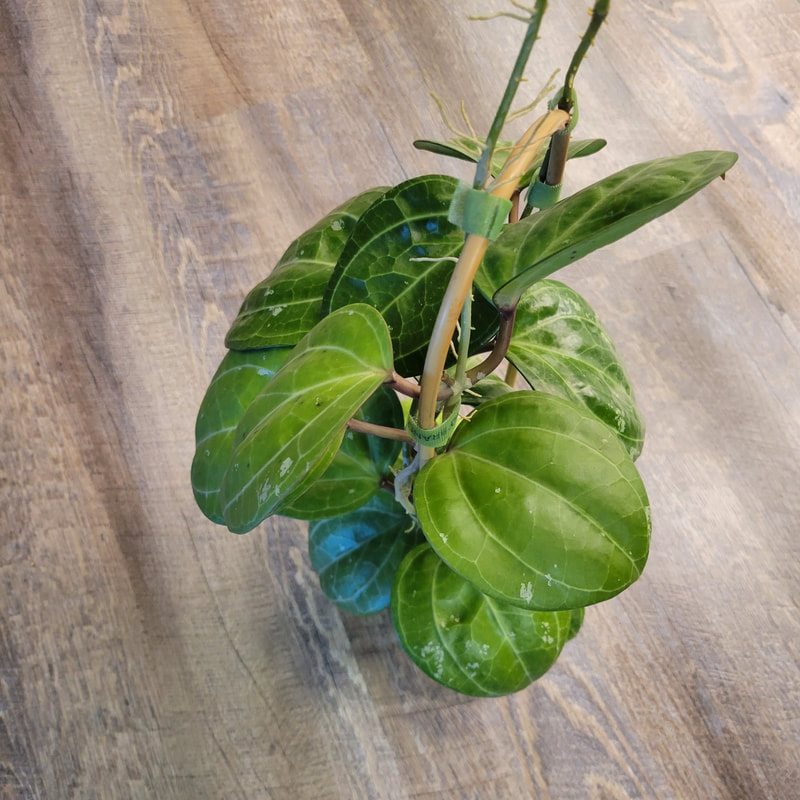
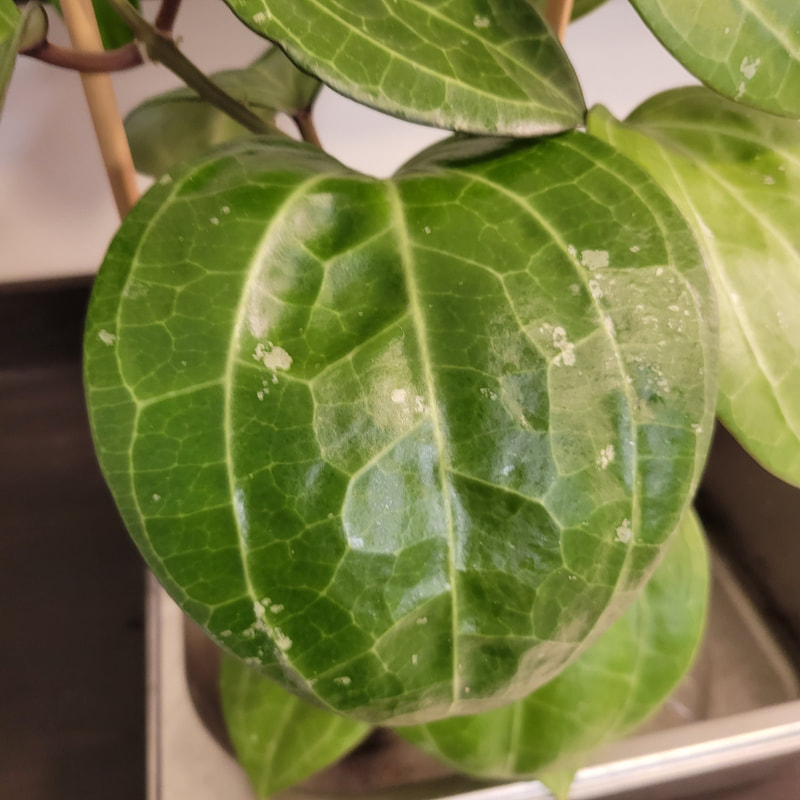
H. sarawak Between the veins and large leaves this one is a 10/10 for me.
H. villosa Wonderfully pubescent leaves with such amazing veins. Honorable mentions:
There are basically way too many Hoyas that are amazing. I would also add in H. waymaniae for the velvety soft leaves and H. fitchii for the incredible veins. |
Archives
March 2024
Categories
All
|


 RSS Feed
