|
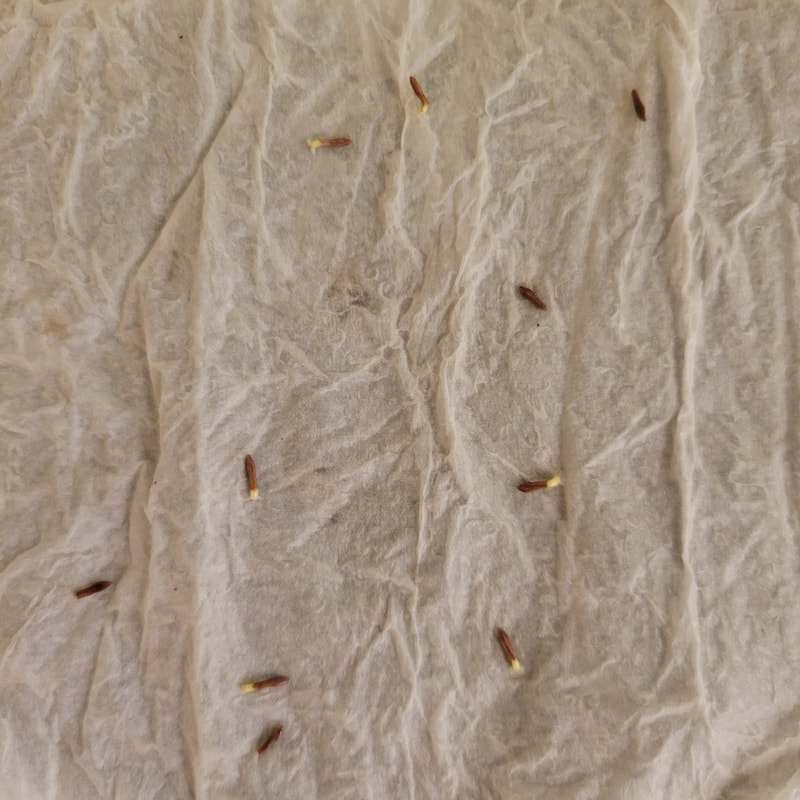
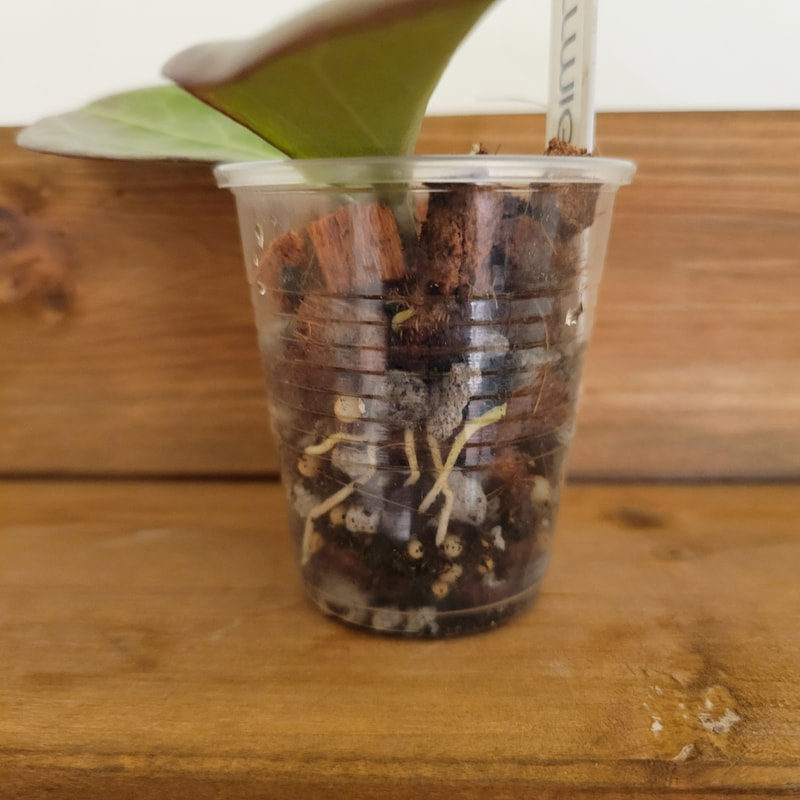
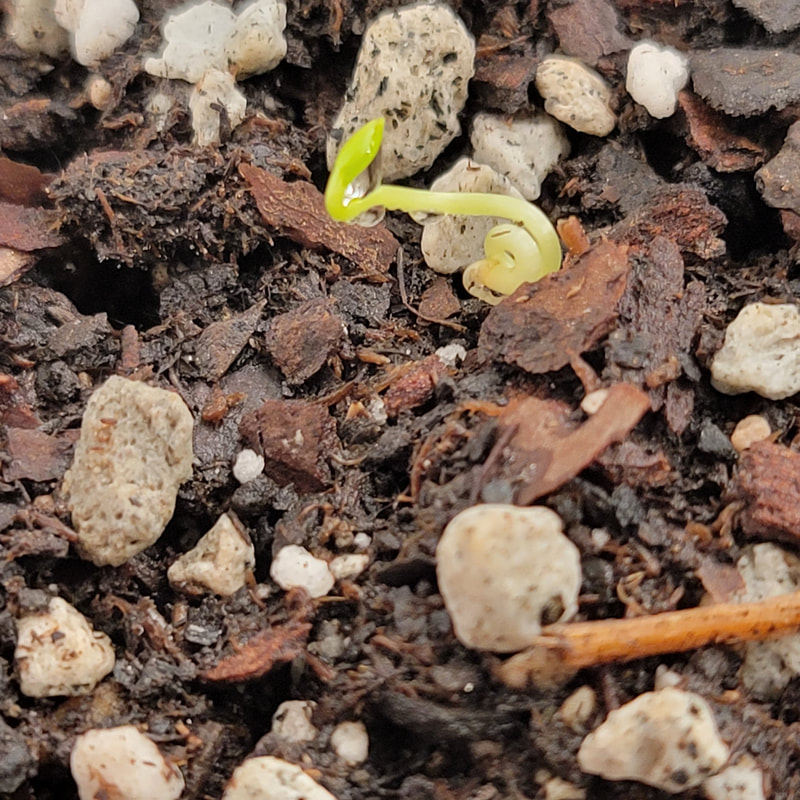
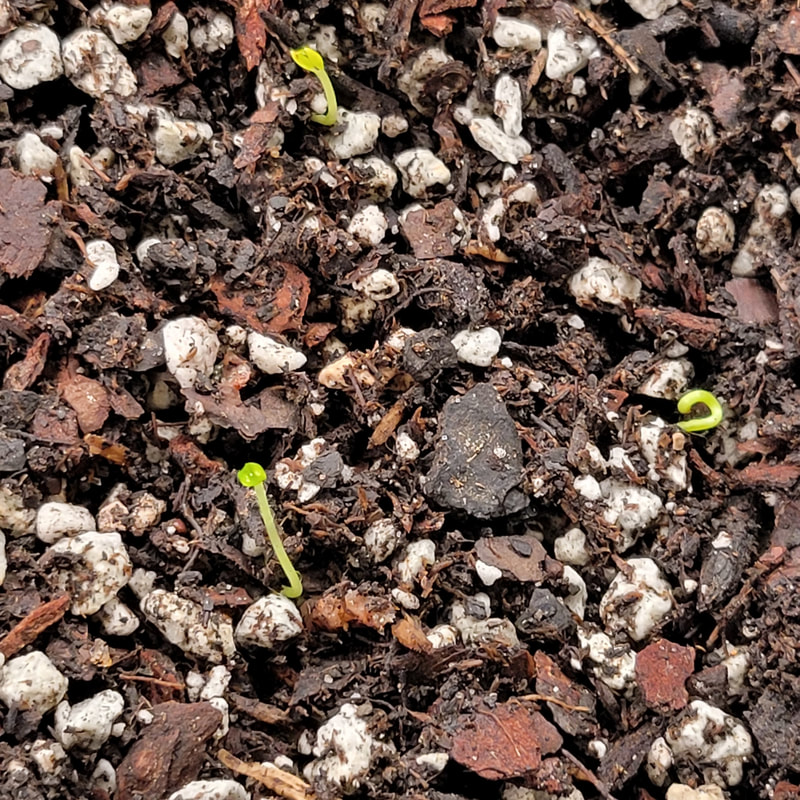
I was reading on one of the Hoya Facebook groups and saw someone talking about sprouting seeds in a paper towel before planting them and how they had better results. I wanted to try this for myself. Method: Take a damp paper towel put your seeds nicely in the middle and fold it to fit in a sandwich bag. The second day of sprouting, I did put the bag on a heat mat for a little bit. I honestly don't know if it really did anything to help them sprout or not. Also, if you leave them on the paper towel too long it will be harder to peel them off. Mine seemed to come off the paper towel easily. After I took them off the paper towel, I sowed them just like I did the previous seeds in my first post. I put the seeds in the bag on 9/25/21 and took them out to sow 9/27/21.
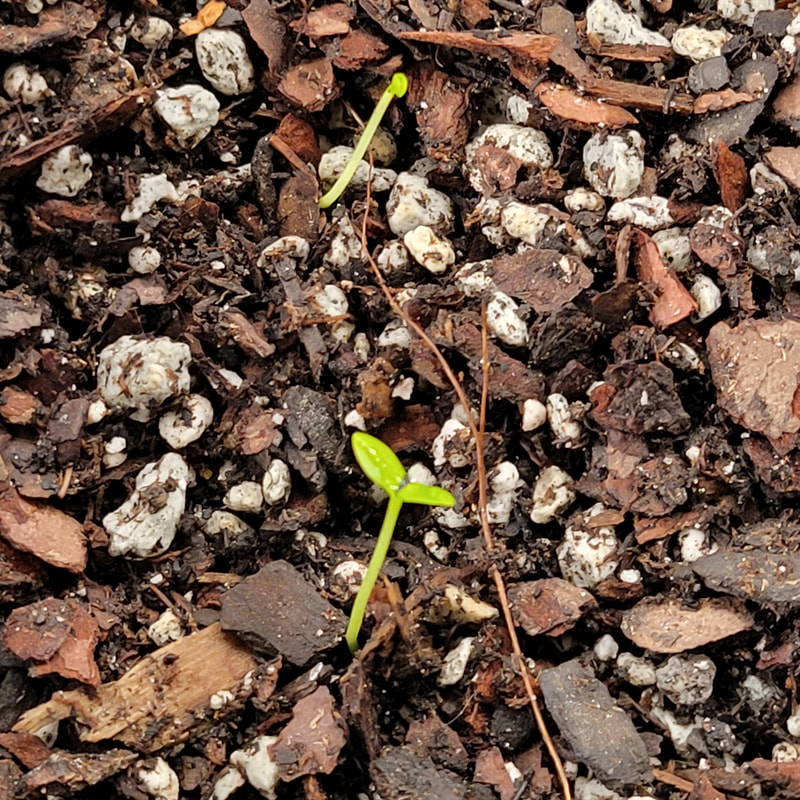
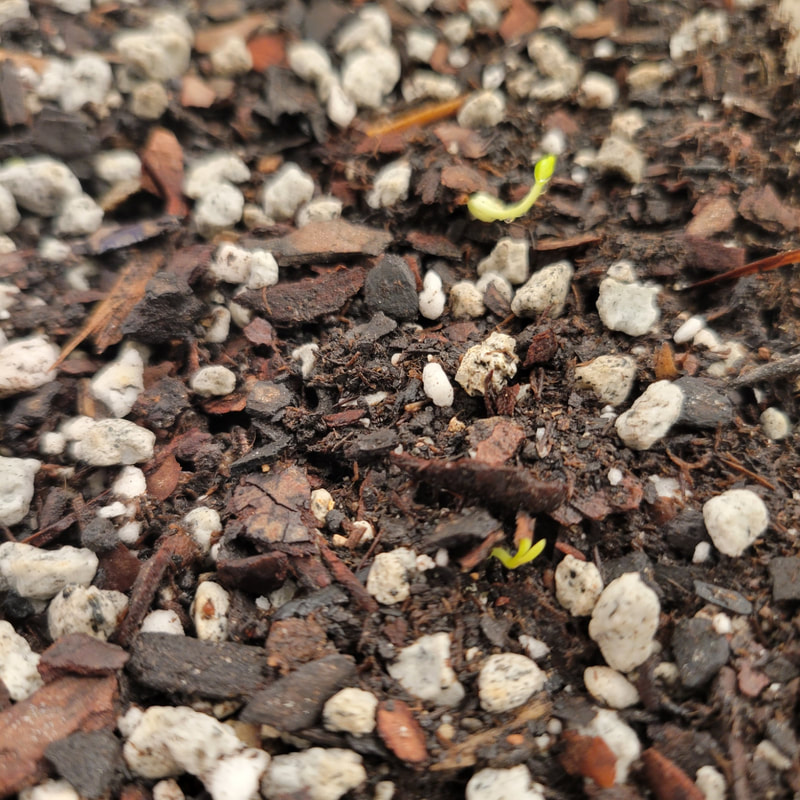
Progress as of 9/29/21 (Day 2 of being planted)
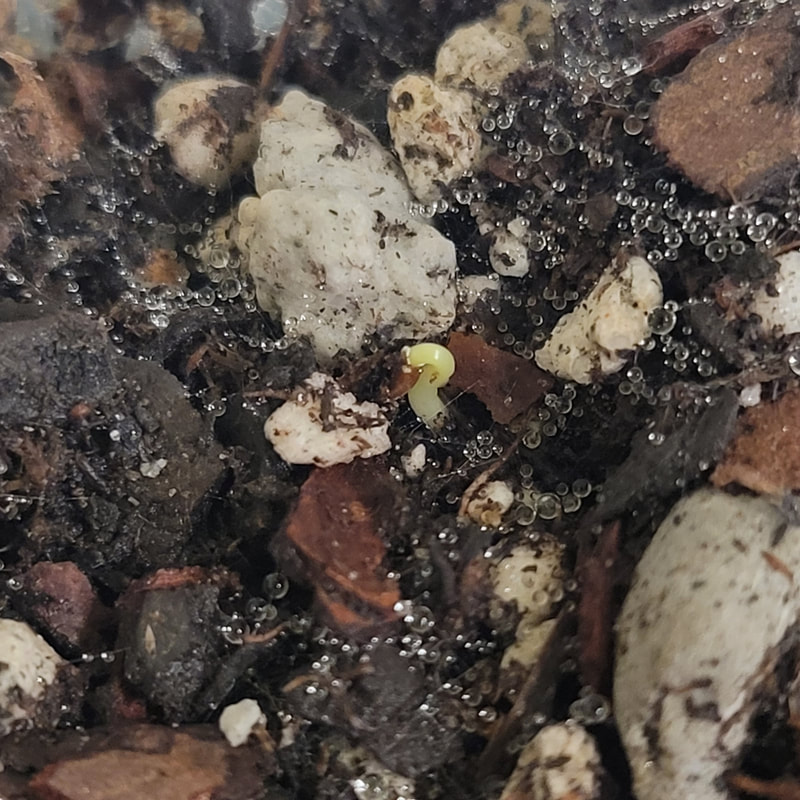
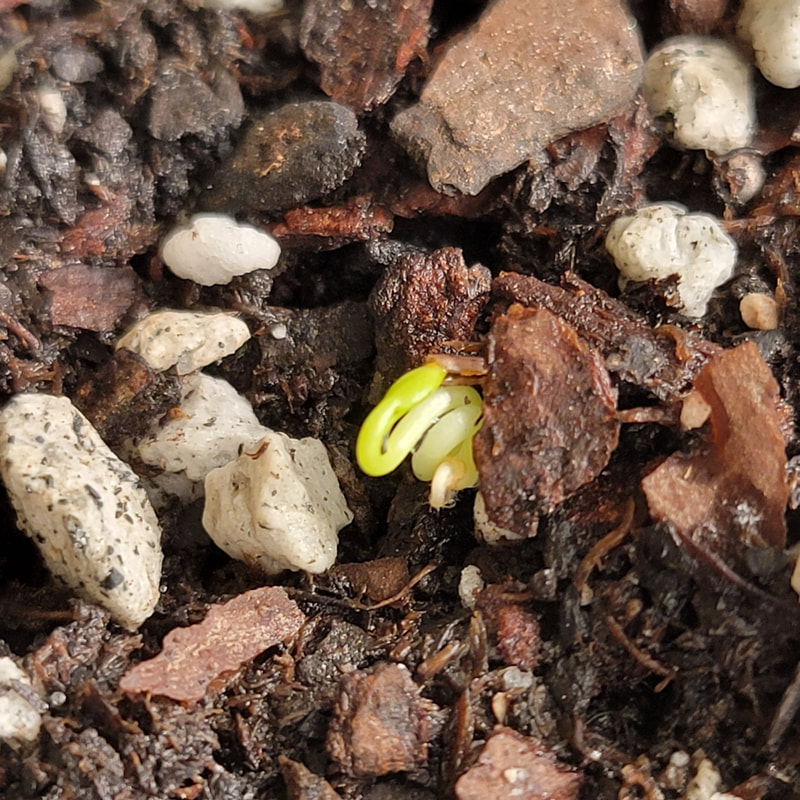
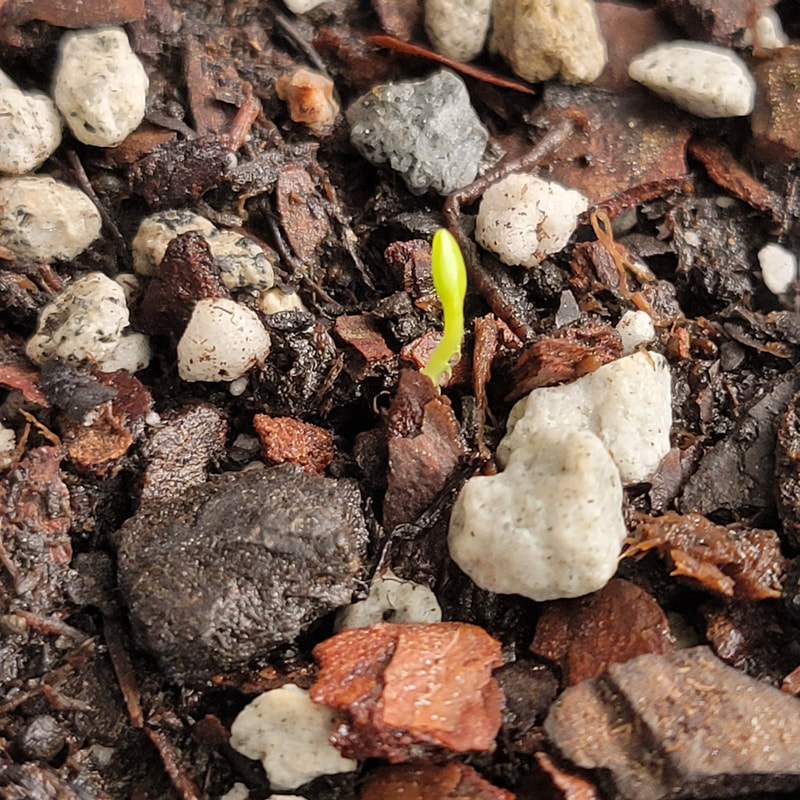
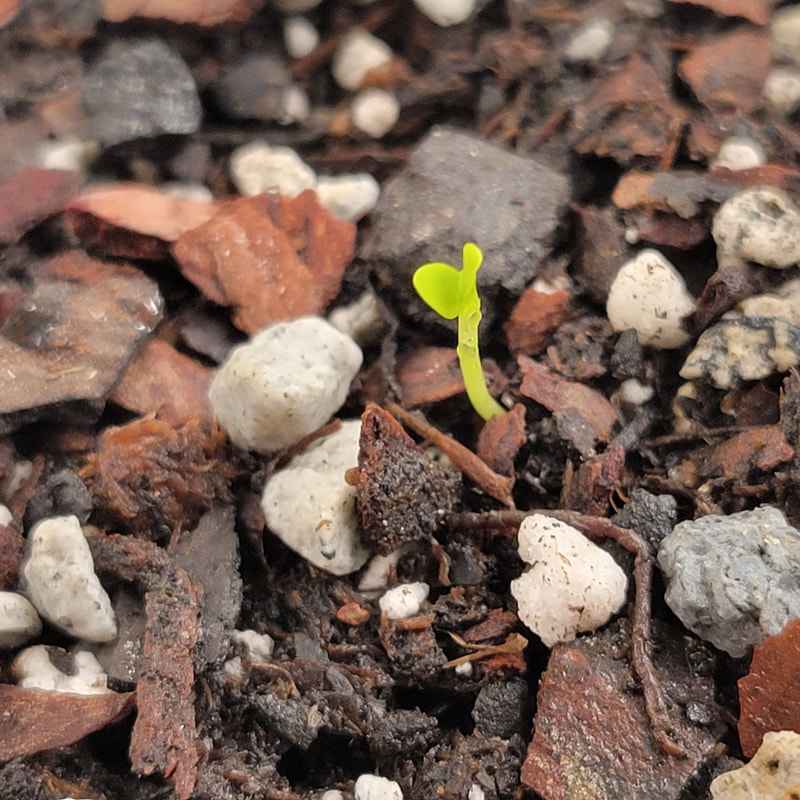
10/3/21 (Day 6 since planted)
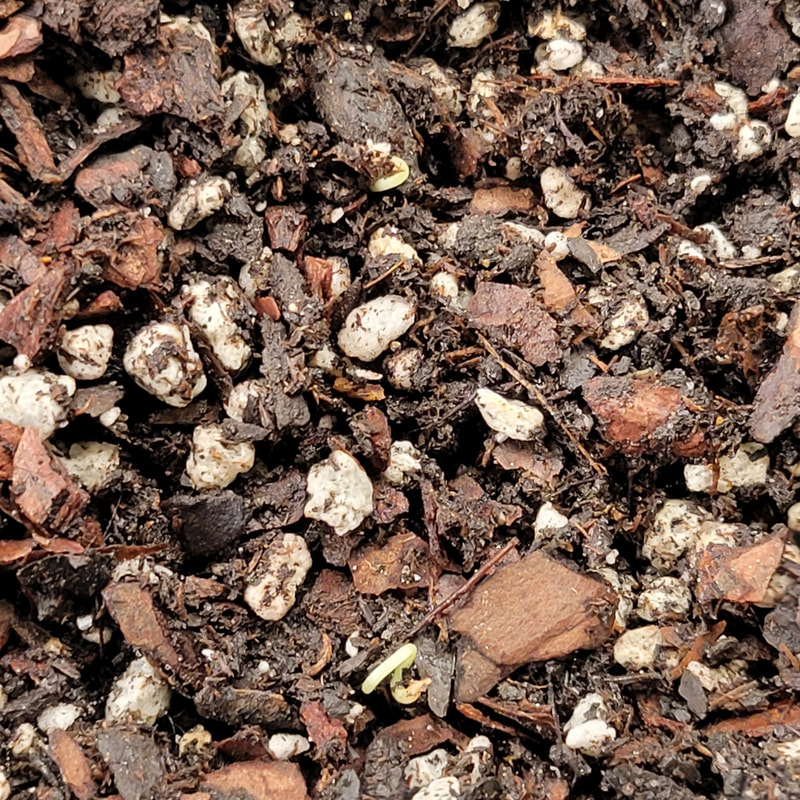
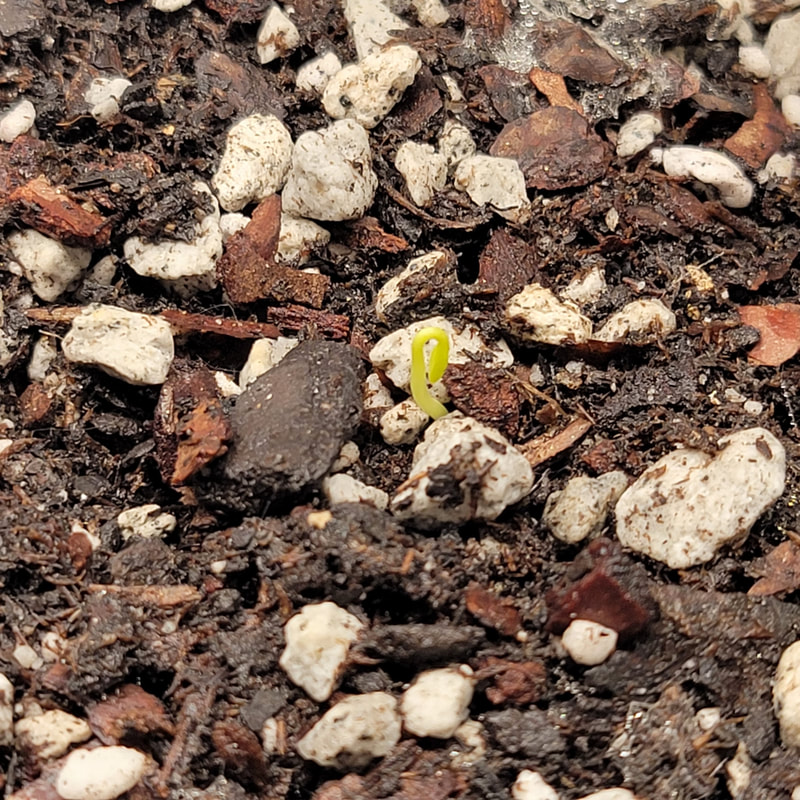
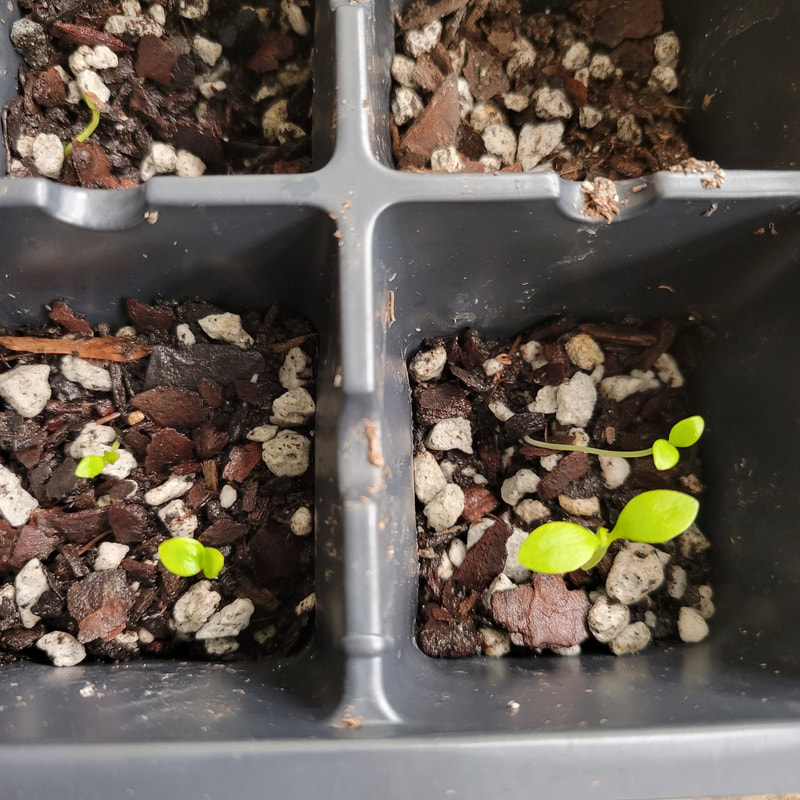
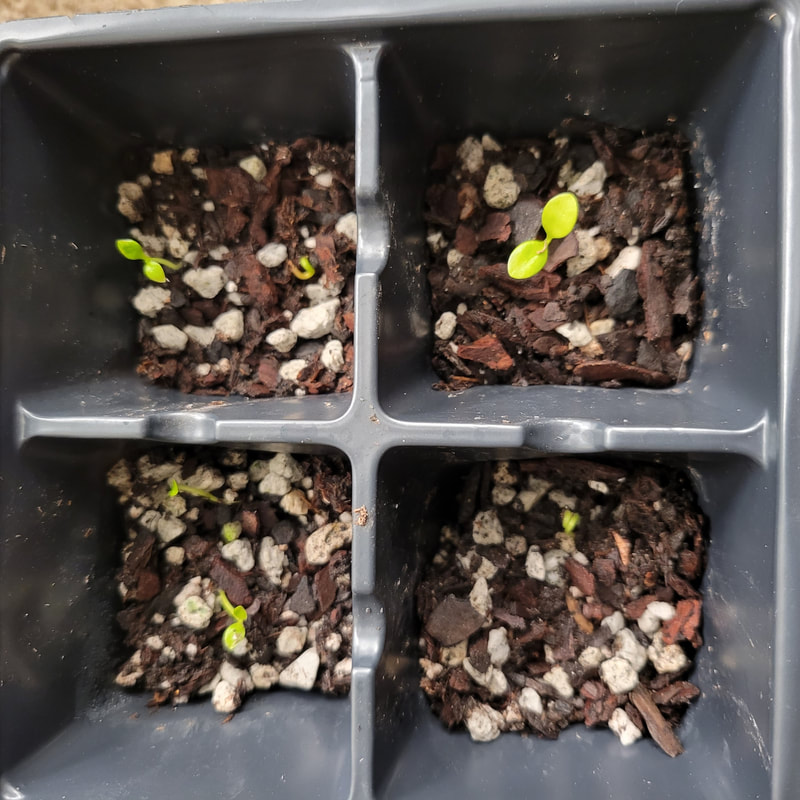
I took some of the same seeds I used in the sprouting method and sowed them straight into soil on 9/25/21 as a control. The seeds used for both of these experiments were harvested 9/15/21. I've heard the fresher the seeds are the better they do. Here is what happened with the control group. It is worth mentioning that this set of seeds are under a grow light unlike the sprouted ones. Progress as of 9/29/21 (Day 4)
Progress as of 10/3/21 (Day 8)
Progress as of 10/8/21 (Day 13)
Progress as of 10/17/21 (Day 22)
0 Comments
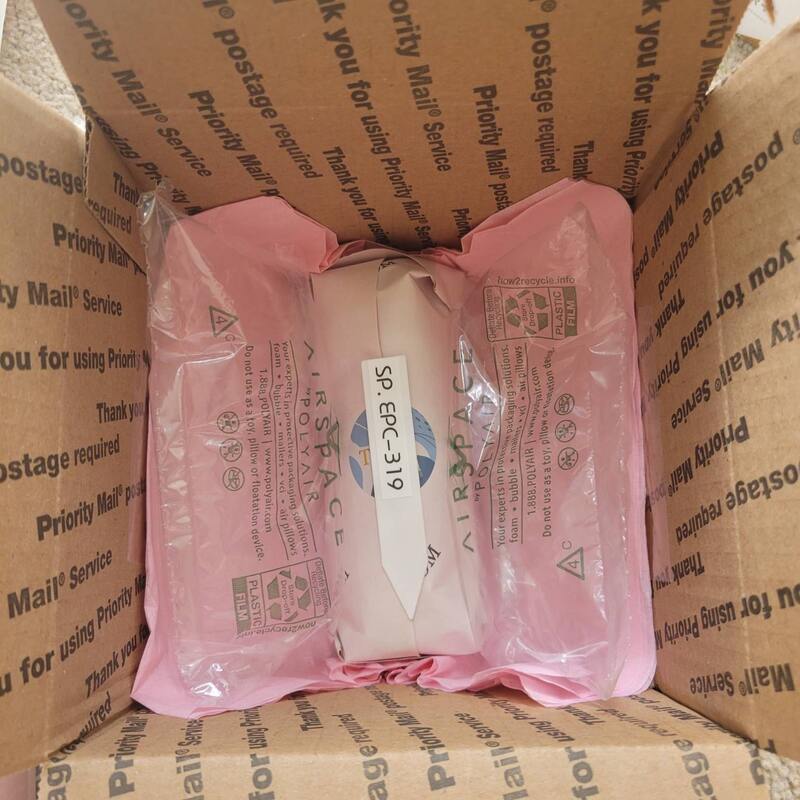
At first it can seem daunting to figure out how to package a plant well enough to survive the mail. Once you do it a few times the worst part is just the time it takes! Everyone has their own methods and this is how I like to pack during the warmer months. Supplies:
Optional Supplies:
If you are packing a plant to sell my first tip would be take a picture of the plant and the roots before you start packing. It is always good to have proof as well as pictures you can send your buyer to set the expectation.
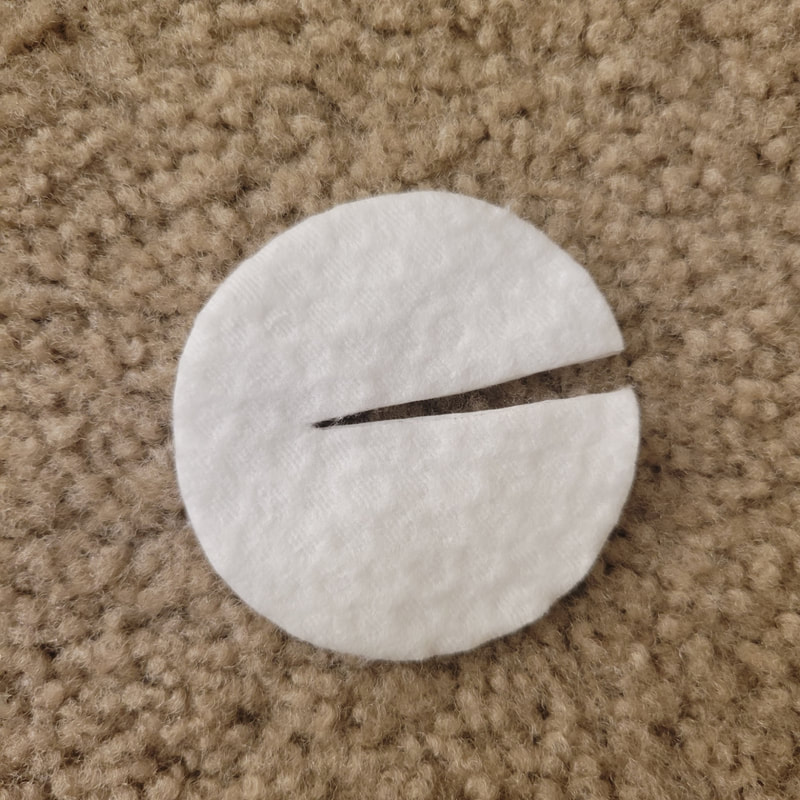
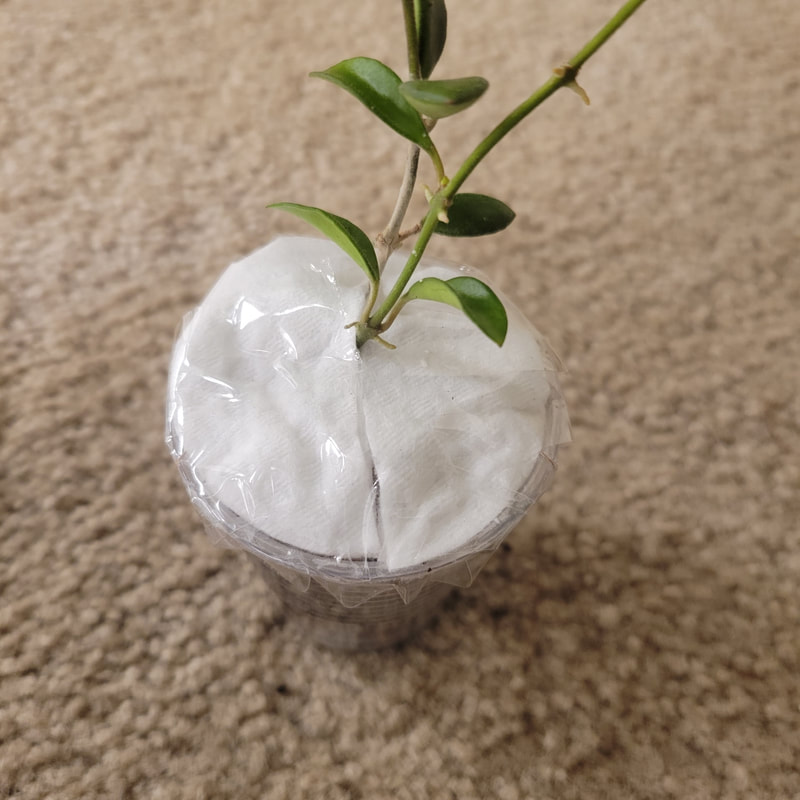
Next, I grab my cotton round and cut down the middle to make the Pac-Man mouth shape. Then, I'll take the cotton round and fit it around the stem of the plant.
Taping down the cotton round is the next step. I will completely secure the cotton round to the pot. This will prevent soil from spilling everywhere during transit.
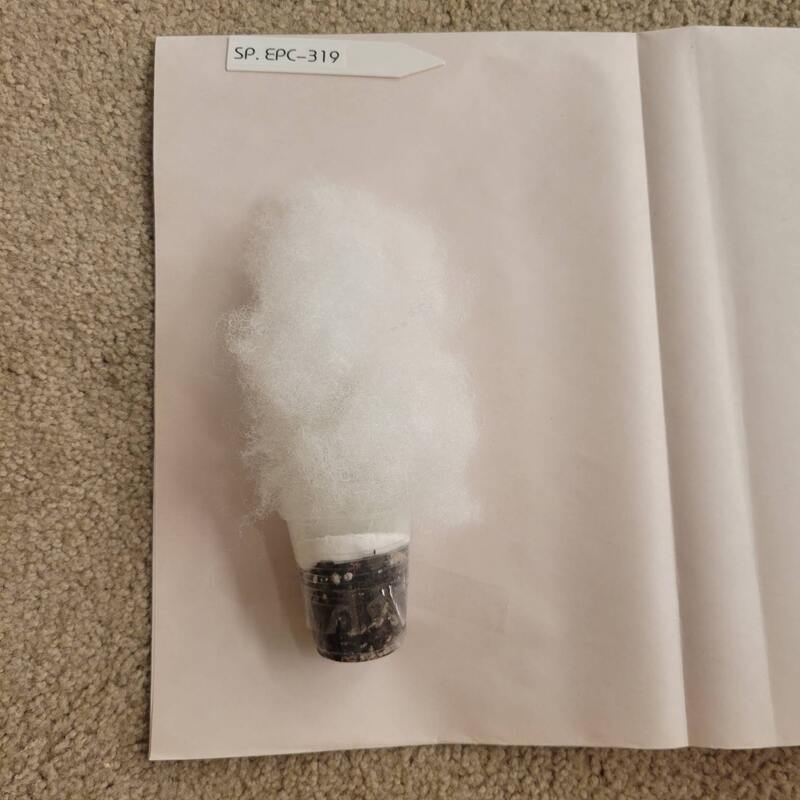
After that, I grab my craft paper. The first thing I do is lay the pot down and tape it to the paper. Afterwards, I will take my polyester fiber and pack it gently around the leaves and stem to make sure it is fully covered. Roll it up nicely and tape up the ends.
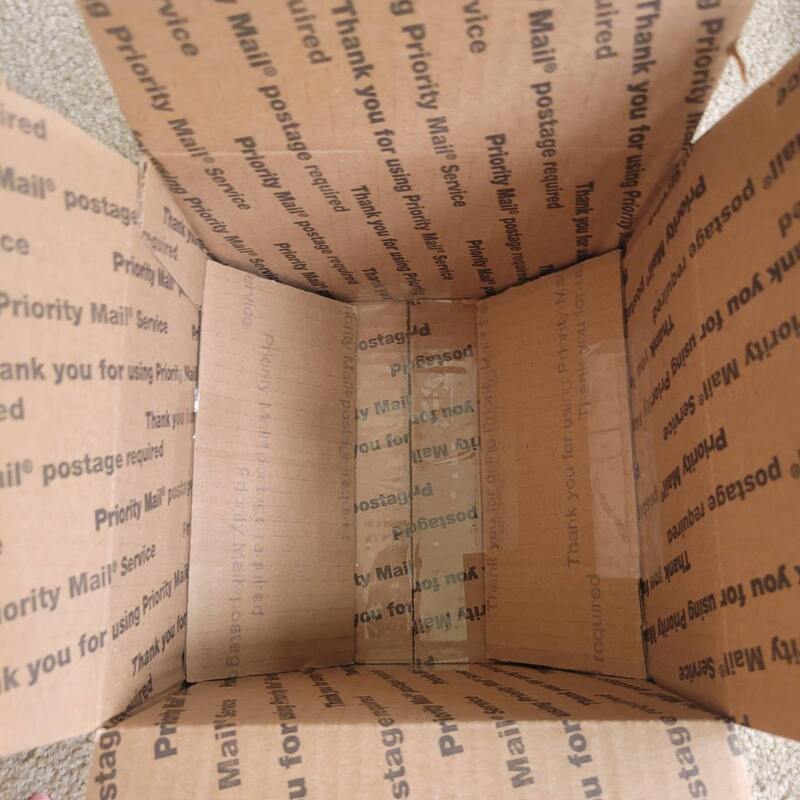
Once the plant is fully packed in the craft paper, I like to take my USPS Box 4 and make a cradle out of the flaps of another Box 4. This will further help the plant from rolling around during the shipping process. I personally like to put a piece of tissue paper down on the bottom to make it look nice and then I will set the plant in. If I have air packs on hand, I will put one on each side. These are not always necessary. If I don't have air packs on hand, I will use packing peanuts or more polyester fiber as a cushion. Lastly, I take another flap from the other box and secure it on top of the plant.
At this point, the package is almost ready to go. I'll stick in an invoice, any additional documentation needed like a phytosanitary certificate, a thank you insert asking for the customer to leave a review, and a sticker from my business. Lastly, I'll seal the box up making sure to put fragile/live plants on the box with marker or stickers and the pre-paid shipping label.
I highly recommend NOT buying your postage from USPS directly. If you use an alternative service like Pirate Ship you do get a slight discount. Also, it is important to note if you use a priority mail box like Box 4 you can only send the package priority mail. I never send plants anything less than priority mail. Tips for Cold Weather:
Shipping Plants the Legal Way: Every state has different agricultural rules when it comes to transporting plants. Trying to find out what states have what rules can be incredibly confusing and even the language used isn't always clear cut. The National Plant Board is a great resource for being able to find shipping requirements for all 50 states. Click here to check out the website. Additionally, depending on whether you are shipping as a nursery dealer or business that can create additional rules to follow depending on the state. It is super important that you always check with your state to see what requirements there are. For the past year I have been using Neptune's Harvest as my only fertilizer. Click here to read the details of that. I have finally decided to try some new products out in my greenhouse tents.
First, I have invested in some Osmocote. I see some of the well-known Hoya growers using it and I figured it must be doing something! April from Unsolicited Plant Talks (UPT), uses Osmocote (NPK 14-14-14). I believe Gardino's Nursery also uses this product but I am unsure what NPK ratio. The nice thing about this product is that it supposedly lasts for 4 months before needing re-applied. However, in my limited time using it I have noticed that the fertilizer pellets fall out all the time. To try to mitigate this, I have mixed Osmocote into my batches of soil to hopefully keep more of it in my pots. The next product I am trying out is FoxFarm Grow Big. I am super excited to see if I get better growth from using this product than Neptune's Harvest. I did notice the bottle says to use it every other watering. I am tempted to dilute it to half strength and use it weekly. I know April did a bunch of Q&A and she mentioned she uses it every week along with Cal-Mag. I also read somewhere that you should use it either in the early morning or late evening. I am assuming this has to do with absorption. That brings me to the last product I am also trying out, which is FoxFarm Cal-Mag. I personally like FoxFarm's products so when April mentioned them, I figured it was worth a shot. I had been meaning to supplement my fertilizer with calcium and magnesium but honestly never got around to it. Cal-Mag is supposed to be helpful for increasing growth. One important thing to note when it comes to using Cal-Mag is that you need to maintain a pH range of 5.6-6.8. Having a good pH level is important because it will determine the availability of nutrients. I highly suggest pH balancing your plant water. Click here to read about my latest fertilizer update May 2022. I have another blog post with a Hoya soil mix (click here) that I have been using for the last year or so. When I changed my tent set up to be enclosed, I noticed it was a little too moist for my updated set up. I am currently testing out a new recipe from a very sweet Hoya friend Sara (twin_sprouts). The new mix is chunkier and airy. I am hoping it works well for me. If it doesn't, I have already repotted all of my collection YOLO.  The recipe consists of horticultural charcoal, coco coir croutons, coco coir, perlite, worm castings. I decided to substitute pumice for perlite as a personal preference. I was also told to only add the worm castings when you are ready to pot. Additionally, I have started using Osmocote (14-14-14) so I added that into the mix as well. Small Batch Recipe: 1 cup coco coir croutons 1/4 cup charcoal 1/4 cup coco coir 1/4 cup worm castings 1/4 cup pumice I got my charcoal and pumice from Bonsai Jack and the rest from Amazon. I did notice that Amazon definitely did not have the cheapest price for the coco coir croutons. Once I've been using it for a while, I will do an update on how my Hoyas are like it! P.S. My tents smell like a BBQ because of the charcoal. 10/26/21 UPDATE It has been exactly a month since I switched all my Hoyas over to this mix and it was a learning experience. I definitely do not recommend switching ALL your plants over to a mix you haven't tested in your environment but c'est la vie. My personal environment: -location Southwestern Pennsylvania -Hoyas live in basic greenhouse (average humidity 80-90%, average temperature 70-80%) After I repotted my Hoyas, the majority of the collection got root rot pretty quickly. I had only watered them once, which was right after I had moved them to the new mix. This new mix definitely does not need watered often as it tends to hold onto moisture. Since it is a chunkier mix, I was expecting it to dry out faster. I ended up chopping up all my Hoyas and completely re-rooting everything in pon. If you want to try making your own pon and need a recipe with links click here. The one thing I do like this mix for is freshly rooted cuttings. I had cuttings that were rooted in LECA. I moved them to this mix and they are loving it unlike my established Hoyas. I notice the roots seem to grow thicker and it is nice knowing that I can go 10+ days without needing to water.
Basially, the morale of the story is always test out new mixes before you go gung ho.
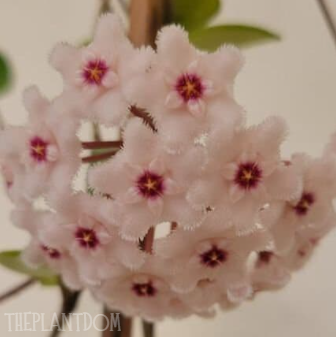
I have very little experience in trying to pollinate Hoya blooms however I think it is a fascinating topic. A lot of Hoya growers seem to leave it up to pollinators (ants, moths, bees, etcetera) to pollinate their Hoyas. Letting mother nature do the hard work is probably the easiest method to getting a seed pod. I also read that Doug Chamberlain from Vermont Hoyas will put his Hoyas outside at night with a light shining on it to attract pollinators. Another way to pollinate a Hoya would be hand pollinating Hoya blooms. This method is a little complicated. I did attempt to try and remove the pollinia from one of my Hoya carnosa 'Krinkle 8' blooms to put in the stigmatic lock of another bloom. With my small jeweler's loupe and a pair of tweezers it was extremely difficult for a novice. I am sure with enough practice and luck this method is possible.  Rodda, M. (2015). Two new species OF HOYA R.Br. (apocynaceae, ASCLEPIADOIDEAE) from Borneo. PhytoKeys, 53, 83–93. https://doi.org/10.3897/phytokeys.53.5079 The basic idea of pollinating a Hoya bloom starts with finding the pollinia located in the pollinarium. In the image above this would be represented with the letter I. To get to the pollinia you would have to take apart the flower carefully. If you are successful in extract this then you would move to step two. 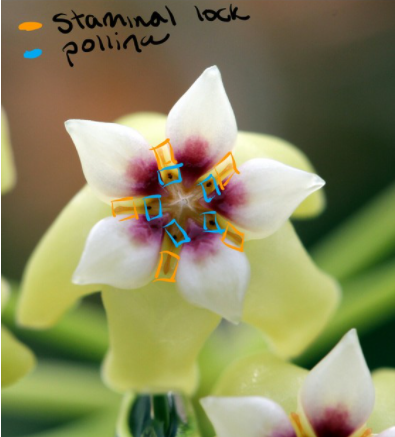 aurorawa. (2016). For adult eyes only...making hoya babies... Houzz. Retrieved 2021, from https://www.houzz.com/discussions/3793437/for-adult-eyes-only-making-hoya-babies?fbclid=IwAR0dxOv6ULajPLKdhc3iv2LTZfVlOGCh5HJCKOnVcOapVPNmNcwUlEYm870. You can choose to either try to pollinate a Hoya bloom from the same plant or a different one. Once you decide what bloom you are going to try to pollinate then you would take the pollinarium and slide it into the stigmatic lock. Check out the article listed above the last picture to get more in-depth information. I have also read that pollinating in either the early morning or evening is preferable to achieving success due to fragrance factories within the bloom. Additionally, waiting till the bloom produces nectar supposedly also helps your chances of a successful pollination. Additional Resources: Click here to read about the pollination of Stapeliads. Ric Morier recommends this article as it is a similar process in Hoyas. Click here to watch a YouTube video of a Hoya being hand pollinated. If you plan on importing more than 12 plants you will need to first get a permit to import plants and plant products through the United States Department of Agriculture. It is completely free to get this permit. I will say that it was a little confusing to navigate. Make sure whoever you are importing from is reputable and follows USA laws and regulations for importation. If the proper documentation is not there USDA will incinerate your plants. It can take anywhere from a few weeks to months from the time you place an import order till it gets shipped and arrives to you. From the time my plants shipped via Dragon Courier it took 6 days to get to me including being held up an additional day due to it being a holiday. I did not take any pictures of unboxing the plants. Each plant had its roots wrapped in sphagnum moss and then the whole plant was wrapped in paper. I unwrapped all the plants and discarded the moss. My order arrived in pretty decent condition considering it had come all the way from Thailand. I still soaked my plants in a mixture of Physan 20 and Superthrive for about 6 hours. Everyone who I talked to who imports Hoyas seem to have their own routines for what to soak them in and for how long. Amanda Law said to not soak the plants for more than 8 hours because it can lead to cell burst in the leaves. Click here to check out her video about importing Hoyas.  After the Hoyas had sufficiently soaked, I trimmed off the dead roots. Some of the Hoyas had salvageable roots so I potted them directly into soil. If I could go back and do things over, I would have just cut off all roots and re-rooted everything. I noticed a few days later that some of the ones I potted in soil weren't looking great root wise. Other Hoyas I did cut up and put in LECA to root. Remember to cut your Hoyas into smaller sections to root as it will be easier for the plant and take less energy. Even though my order did come in decent condition I did have leaves yellow and fall off of various plants for the first few days. I wasn't super concerned by this because the plants had been put under a lot of stress and had a complete change of environment. Not to mention sometimes USDA heat treats the packages coming in. It has been probably about a month or so since I received my import order and most of the plants have acclimated well. It is normal to lose a few. Some I still have rooting in LECA but most are potted up and, in my tent, now.  I quarantined my import plants longer than I normally do. Additionally, besides the initial soak in Physan 20 when they arrived, I wiped down all the leaves with insecticidal soap before I did anything with them. I would rather be extra safe than deal with root mealybugs or any other pest.
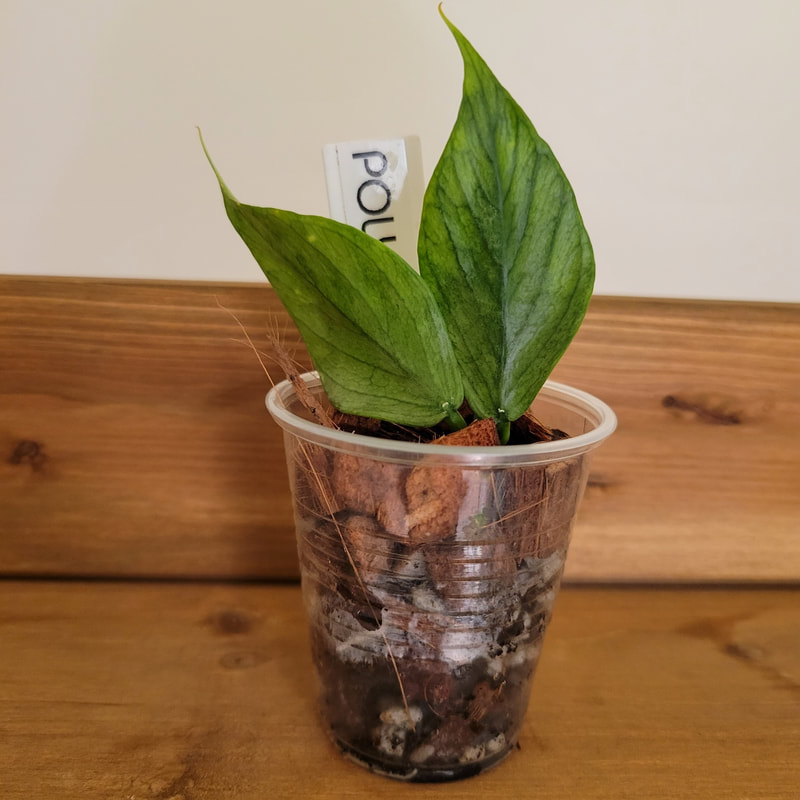
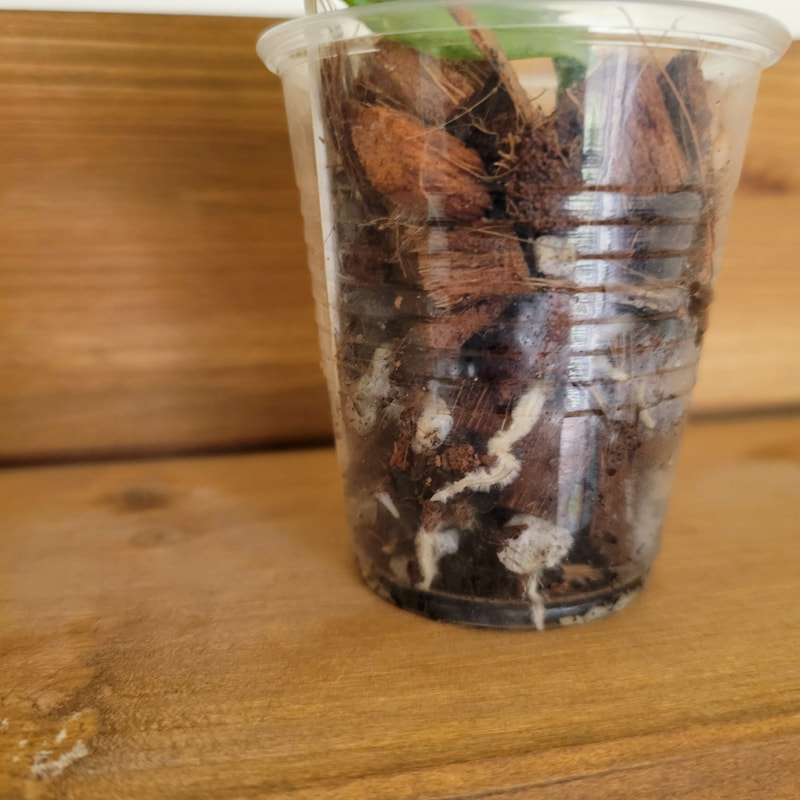
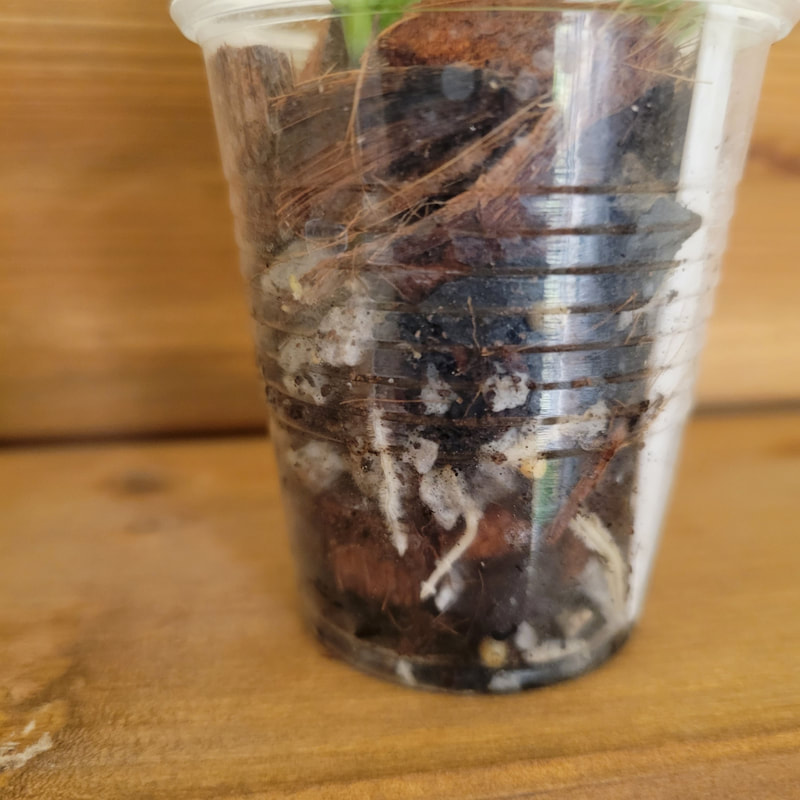
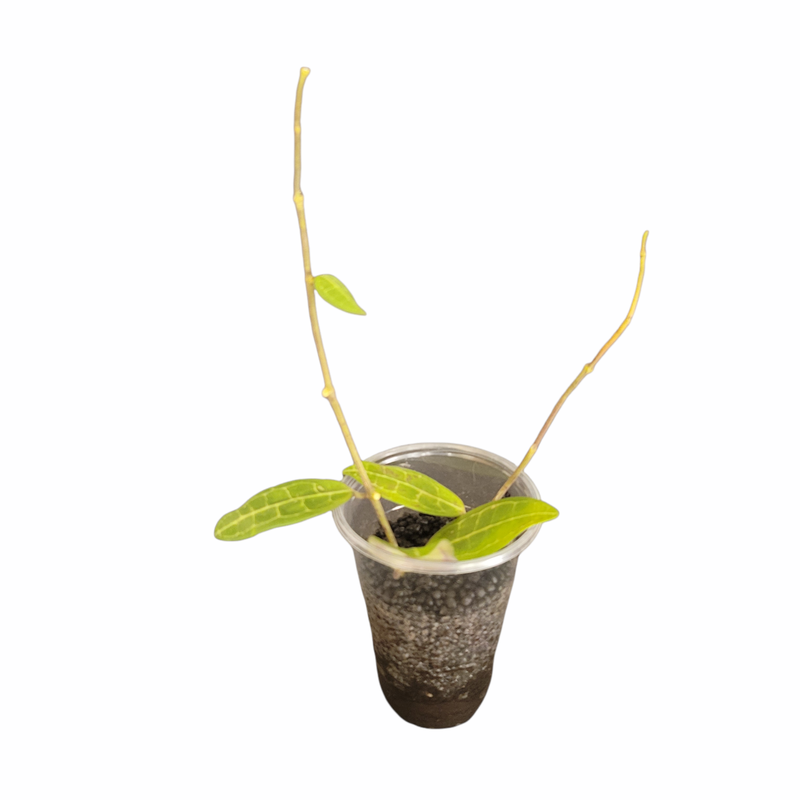 I received these beautiful Hoya elliptica cuttings in a trade with a local plant friend. She had kindly put them in stratum. This is my first experience using this grow medium but I hear it is similar to pon. Strata is a layer of sedimentary rock or soil. The consistency of stratum is pellet like but easily crushed between your fingers. I believe it is the same as tephra. It is also commonly used in fish tanks.  Stratum does require a reservoir of water. I had the cuttings in stratum for 2 weeks and I wasn't super impressed with the root growth. The smaller cutting didn't make it and the larger one did grow roots but nothing too crazy. I personally feel I get better results from LECA. The last few days of it being in stratum I did put it under a heat mat but I am not sure it really helped.  Once I took the cutting out of stratum and potted it up, I decided to sanitize it. I took a microwave safe dish put the stratum in with some water and let it go for a minute and a half to two minutes. After that, I rinsed the stratum carefully.
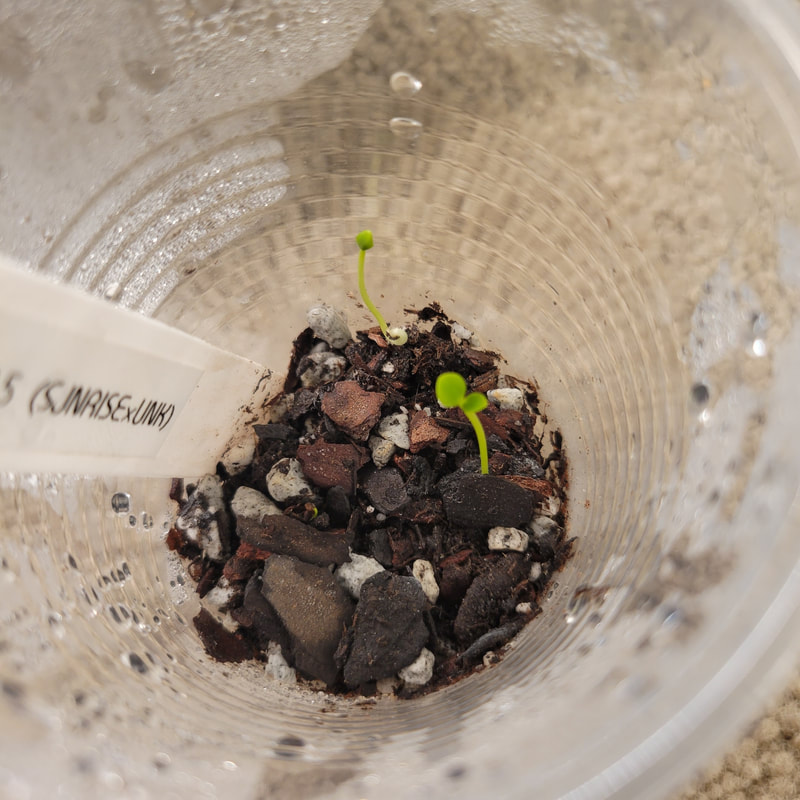
Overall, it was fun to try a new grow medium. It is possible that maybe using a H. elliptica for a test subject wasn't the best since it tends to be a finicky Hoya. I might try again with another Hoya cutting at some point. I bought seeds from Kirsten Dyer aka SmallBatchTropicals on Etsy. I wanted to try my hand at growing Hoya from seed myself. The mom is H. Sunrise and the dad is unknown. When I received the seeds the fluff was already taken off and ready to sow. The fluff does not have to be taken off before you sow them.   I took a glass container and put a layer of moistened soil on the bottom about 1/2 inch thick. I then laid the seeds on top. I covered the seed with a thin layer of soil. Once in place, I lightly misted the top layer.   I decided to place the container in a gallon sized bag so I could poke air holes in the top with tooth pick. 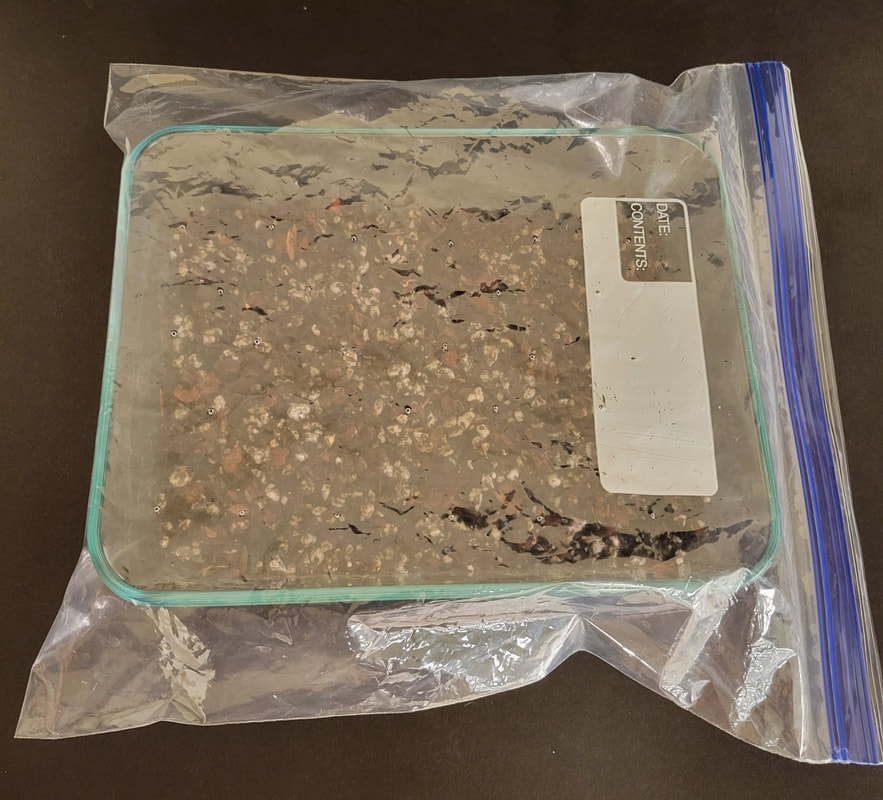 Then, I put my contraption on a 20x10 grow tray with a heat mat underneath. From what I read it should take a couple days for the seeds to start the germination process. I will say the more I've thought about it, I should have put them in a taller container so they would have more room to grow before I have to transplant them. After a few days, I put them under a grow light as well. Side note: If for some reason you sneeze and blow your seeds everywhere you can use a vacuum wand with a sock on the end secured by a rubber band to suck up the seeds. I was able to find a few of them this way but still ended up losing a bunch. Seed Progression Sown 9/21/219/27/21
9/29/21
10/03/21
10/08/21
10/17/21
Click here to read my blog about sprouting Hoya seeds
Click here to see my November seed update Click here to to see my December seed update Click here to see my February seed update Click here to read about lessons I've heard from growing Hoya seeds Additional Resources: Click here for Amanda Law's Hoya seed propagation video Click here for Doug Chamberlain's Hoya seed propagation videos It can be difficult to understand how to accurately write out scientific names for plants especially as a beginner. Here is some helpful information to make it easier:   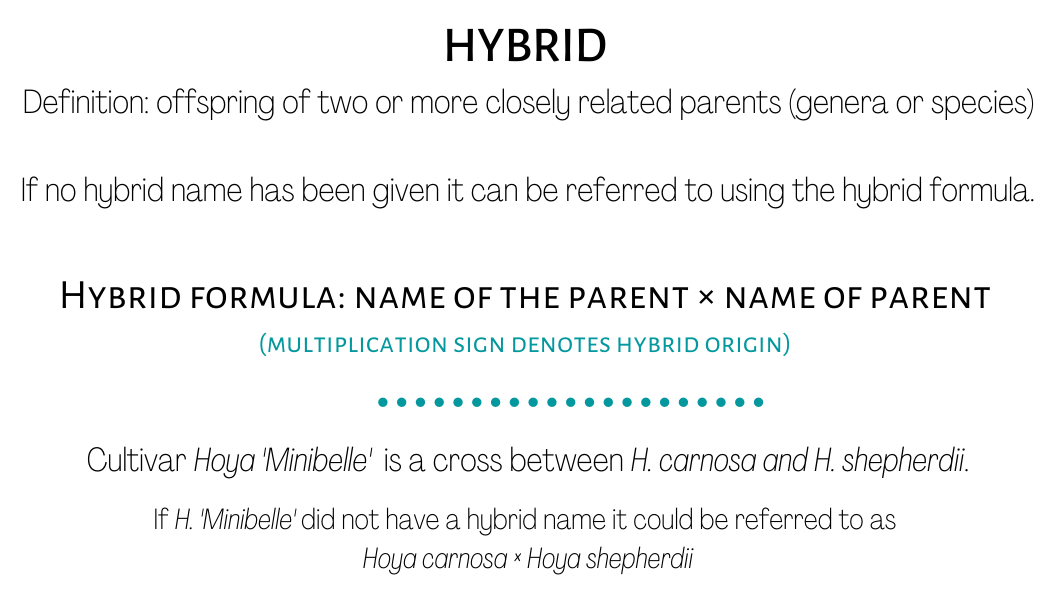 It is important to note there are many more rules and intricacies to plant names. The information presented was just some of the basics. Additional Resources: Click here to access Arboretum at Penn State's document Writing Plant Names Click here to access Plant Names: A Guide for Horticulturists, Nurserymen, Gardeners and Students by the Horticultural Taxonomy Group. References:
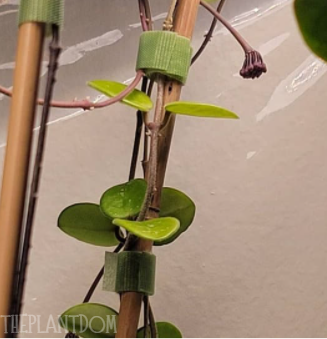
Alexander, C., Armitage, J., Brickell, C., Coombes, A., Green, N., Jebb, M., Knees, S., Lord, A., Matthews , V., Miller, D., Whiteley, A., Scott, E., Andrews, S., Trehane, P., & Leslie, A. (2017). PDF. Horticultural Taxonomy Group. Peducle formation
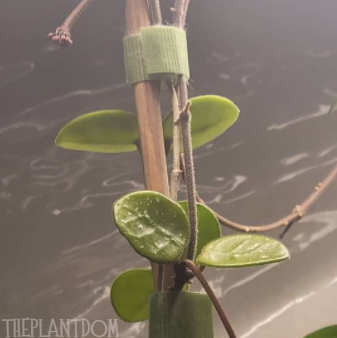
Bud Formation
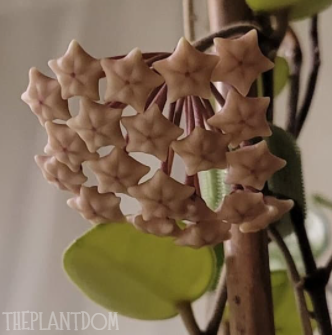
pre-anthesis (Before flower is open and functioning)
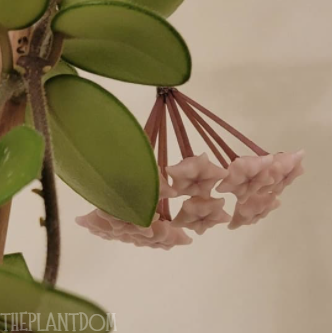
Anthesis
|
Archives
March 2024
Categories
All
|


 RSS Feed
